Revamp Your Garage: DIY Epoxy Flooring With Surface Preparation

Are you trying to give your garage floor the final touch? With a vibrant, glossy epoxy floor finish, your bike will look like it belongs in a showroom every time you drive into your garage. In this article, we go over everything you need to know about using epoxy to complete your garage floor makeover.
WHAT ADVANTAGES DO EPOXY GARAGE FLOORS OFFER?
Because epoxy not only provides a polished appearance but also repels oil stains, collects water, and cleans up like a kitchen counter, your garage floor is well worth the cost. On a wet day, an anti-slip ingredient helps you stay on your feet, and faults in the concrete can be concealed with color chips and custom paint colors.
CAN YOU EPOXY YOUR GARAGE FLOOR?
Epoxy applications are easy do-it-yourself projects that may be finished in a weekend. Prior to starting your project, it is best to take the following factors into account:
- Take everything out of your garage to create a clear area.
- Cover the regions of the lower walls surrounding your project site with plastic and painter's tape.
- Use a hose to rinse the floor with water.
- The floor has to be cleaned with a bristle broom and a cleaning solution.
- Verify that the garage floor is arid.
- Apply your preferred epoxy coating by rolling it on. For beginners, breaking this method down into 10x10 chunks is an excellent approach to simplifying it.
- Select a flake blend color and disperse it throughout the epoxy. Take a handful of the colored flakes and toss them into the air like you would feed chickens to ensure an equitable dispersion.
- Scrape off and hoover up any surplus color flakes that are present on the surface.
- Apply a clear top coat for protection to finish the surface.
EASY STEPS FOR EPOXY FLOORING
We will provide a step-by-step process for epoxying a garage floor in the following seven steps:
STEP 1: TIDY UP THE GARAGE AREA.
Eliminate anything from your garage as a first step. Choose a day when the weather is nice because you don't want to run into the danger of damaging your belongings. If your garage is overflowing with storage, consider renting a storage pod or finding a temporary home for your belongings.
STEP 2: CLEAN AND PREPARE THE GARAGE FLOOR.
To secure plastic sheeting against the walls, place painter's tape around the edge of the foundation or at the height where the epoxy will be applied to the walls. Thoroughly brushing the floor will remove any dust or grime. Use an old paintbrush to remove any dust from the seams and edges. Also, wire brushes can be used to clean hard wood flooring.
To see if the floor is clean, try applying a strip of duct tape to it and then peeling it off. If there are any dust particles or debris on the tape, the floor needs to be cleaned once again.
Your garage flooring may have paint residue that needs to be scuffed off. Use a floor maintenance machine and a light sanding pad. During this process, any dust that collects should be swept or vacuumed up. After that, scrub the surface with a bristle broom and an all-purpose cleanser. Make sure you give the floor a thorough rinse and give it at least four hours to dry. Next, move on to Step 3.
STEP 3: PREPARE THE SURFACE.
The last stage in adequately preparing the surface before applying the epoxy coating is etching concrete. The very surface of the concrete should be engraved, which essentially removes a microscopic layer of the concrete's surface, to ensure that there is a clean and receptive surface for epoxy to adhere to. Concrete etchants are often acidic.
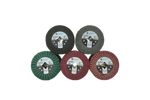
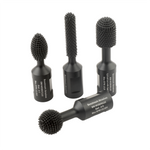
Use a multi-surface floor surface grinder with concrete grinding wheel to grind and edge concrete floors before finishing them. These devices can be used to ground, refurbish, and repair concrete flooring. Such units are made to the most excellent standards possible for use in commercial, industrial, and residential settings.
STEP 4: DRYING THE FLOOR
Trapping water beneath your epoxy coating is the last thing you want. You run into the danger of decreasing the adhesion between the epoxy coating and the concrete, even with the finest surface preparation. Waiting at least 28 days after the concrete has been put in is recommended if you are epoxying a newly installed garage floor since, during that time, the water in the concrete mix will be continuously reacting with the cement and evaporating.
Make sure the concrete is arid before moving on to the next phase after cleaning and etching your flooring, as described in the previous steps. This could take two to three days if it's in the midst of the summer. You should wait a week in the spring or autumn to make sure all the moisture has evaporated. A moisture meter can be used to track the levels if you are still determining when the moisture will disappear.
STEP 5: VERIFY THE TEMPERATURE ON THE FLOOR.
The epoxy kits are made to cure in a specific range of temperatures. High temperatures can cause the reaction to happen so quickly that you might need more time to apply the coating uniformly before it is too thick to deal with. Reactions that occur at too-low temperatures will be slowed down and may never entirely happen. I've seen terrifying tales on message boards about epoxy coatings that were put down low and never went away. You must use the floor temperature to identify whether or not you are in the application temperature window. Use an infrared thermometer to accomplish this.
STEP 6: MIX EPOXY KIT
The components of epoxy kits are hardener and resin, each individually packaged. Open each epoxy container so that you can start combining. Apply the epoxy resin directly to your garage floor surfaces by mixing the hardener with it, following the directions on the technical data sheet and product label. Epoxy pigments should be combined with the epoxy mixture before being applied to the surface and utilized for decorative purposes.
Stir for three minutes to make sure all the ingredients are well combined. Using automatic mixing equipment is preferred; properly utilized mixing sticks are nevertheless acceptable.
When epoxy resin and hardener are combined and react to generate a covalently cross-linked polymer structure, the result is a complex, durable coating. The two ingredients must be well blended during mixing. The coating's performance will suffer if you undermix or leave pure pockets of each component in the bucket.
STEP 7: APPLY THE EPOXY
To ensure adequate curing, the epoxy formula must be applied as soon as possible after mixing. Make sure the garage has good ventilation before beginning any work there. Pour the epoxy into a roller tray that has been lined with a liner. Using a 3-inch paintbrush, ensure that all borders and corners have a good layer of epoxy covering them. Head to the corner farthest away from the door. Cover a 10-by-10-foot area with epoxy paint using a 3/8-inch nap roller with an extension handle.
The texture and stickiness of epoxy should be greater than that of regular house paint. Rewet the roller and run it perpendicularly over the portion to feather out any uneven lines. Take care of every area of the floor one by one. If using two coats, cover the entire floor, let it cure for 12 to 24 hours, and then add another coat as necessary. By maintaining a moist edge as you proceed from section to section, you can prevent noticeable seams while the epoxy is drying.
STEP 8: USE THE COLOR FLAKES.
Applying the color flakes should be done before applying the finish topcoat when the area is still wet. Grab handfuls of the flakes and toss them like you would poultry feed to distribute them as evenly as possible. This will allow the color flakes to be distributed uniformly across the application. As an alternative, try swishing a bunch between your fingers, just like you would with grass seeds. Spreading them by hand would work better, even though a lot of companies package their flakes in cans with shaker tops so you can apply them.
You can improve your technique by moving your practice onto an outdoor tarp. Proceed in the same manner as you did with the epoxy, working your way from the back to the front of the garage. When all the color flakes have settled, scrape off any leftovers and hoover them up. It is advisable to let the entire floor dry for 12 to 24 hours after applying the coating (longer in humid or cold weather).
STEP 9: APPLY THE TOPCOAT
Use a clean paintbrush to ensure that the material is applied to all corners, edges, and seams. Using a 3/8-inch nap roller, roll on the clear top coat in 10-by-10-foot areas, beginning at the furthest point from the exit. Cover each section until the entire floor is covered, working first in one direction and then perpendicularly. Before parking, it is advised that vehicles wait at least 72 hours and pedestrians remain at least 24 hours. It could take longer in cold or humid weather.


