Choosing The Right Abrasive For Rust Removal: Tips And Techniques

Unfortunately, rust is an all too common sight, appearing as flaky, orange-brown patches that can ruin the appearance of metal. But rust isn't just about appearances; it's a silent destroyer that eats away at metal, decreasing its strength and shortening its lifespan. Whether it’s outdoor furniture, automotive components, or valuable tools, rust has the power to destroy almost any metal object, impairing both its beauty and usability.
Rust removal is an essential process to help your metal items function better, last longer, and maintain their original sheen. Not only does it restore objects to their former glory, but it also prevents further damage. The secret to achieving the perfect outcome lies in having the right tools, using the correct removal procedures, and, most importantly, choosing the appropriate abrasive for the job.
What is Rust?
Rust develops when iron or a metal containing iron is exposed to air and moisture, causing a chemical reaction called oxidation. When metal rusts, a process that creates a flaky, reddish-brown iron oxide, it loses both its appearance and its structural strength.
Several factors can accelerate the rusting process. Moisture is the most significant; rainwater, high humidity, or even a simple spill can kickstart oxidation. Metal objects near the ocean or those exposed to road salt during winter will rust more quickly because salt significantly speeds up the corrosion process. Industrial chemicals or acids in the air can also lead to increased rust.
Different metals rust in different ways. Steel and iron rust most easily because their composition readily reacts with oxygen and water. Other metals, such as stainless steel and aluminum, naturally form a protective layer that makes them more rust-resistant. Even so, given the right circumstances, these metals can still corrode, though they may not show the classic orange rust found on iron and steel.
Materials and Tools Required
Before beginning any rust removal project, it’s crucial to have the appropriate equipment and supplies. Below is an outline of what you'll need.
1. Abrasives
- SANDPAPER - Excellent for manually sanding tiny, light-rust spots.
- SANDING BELTS - used in conjunction with belt sanders to remove more rust from larger, flat surfaces. Using a tube belt sander, sanding belts can also be helpful for sanding pipes.
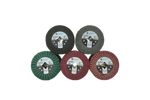
- SANDING DISCS - Ideal for quickly removing rust from metal objects with power sanders.
Related Article: Abrasive Tools Every Fabrication Shop Should Have For Winter
2. Protective Equipment
- Masks
- gloves
- Goggles
3. Chemical and Natural Rust Removers
- Chemical Rust Removers: These products are designed to remove rust fast. Wear safety equipment and carefully follow the instructions.
- Natural Substitutes: White vinegar, lemon juice, and baking soda can also remove rust for a more environmentally friendly solution. They may take longer to operate, but they are safer to use.
4. Cleaning Materials
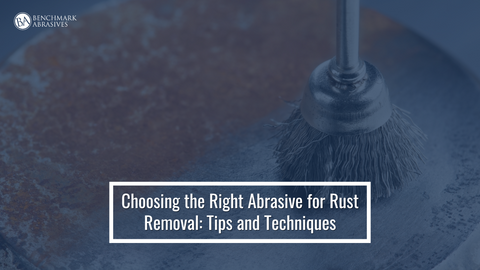
- WIRE BRUSHES — You can remove loose rust with a handheld wire brush before and after using removers.
- CLOTHS — After removing the rust, soft cloths can clean and dry the metal surface, and natural removers can be applied.
Getting the Metal Surface Ready
Thorough surface preparation is a non-negotiable first step. The steps involved are as follows:
- Clean the Surface: First, wipe down the metal with a clean cloth to remove any loose dirt or debris. This initial cleaning allows you to see the rust more clearly and choose the most effective removal technique.
- Wash with Soap and Water: Lather the surface with a gentle soap and warm water, scrubbing away any residue. This step helps clear away any grease, oil, or other materials that could hinder the effectiveness of rust removers. Use a soft brush or sponge to scrub without damaging the metal.
- Dry Completely: After washing, completely dry the metal item using a fresh cloth or towel. Any remaining moisture could cause further rust if you don’t intend to remove the rust right away.
- Use a Degreaser (If Necessary): If the metal is heavily soiled or you find that soap and water were not sufficient, you may need to use a degreaser. Apply it as directed, then wash and dry the metal again.
It is crucial to clean the metal surface before removing rust. Dirt, grease, and other impurities can act as obstacles, impeding the effectiveness of both chemical and mechanical rust removers. Additionally, cleaning prevents pollutants from being pushed further into the metal, which could lead to more issues later.
Rust Removal Methods
There are multiple methods for eliminating rust from metal, including chemical solutions and mechanical procedures. However, the selection depends on the item's size, the extent of the rust, and your preference.
Method A: Mechanical Approaches
You can use abrasive pads or sanding sheets for mild to moderate rust. This process involves manually rubbing the rusted area until the clean metal is visible. For larger areas or stubborn rust, consider using power tools like a power sander or a drill with a wire brush attachment to save significant time and hard work. These tools do the hard work for you, making the rust removal process much more manageable. Just be sure to wear safety gear like goggles and gloves to protect yourself from flying debris.
For industrial tasks or extremely severe corrosion, abrasive blasting (sandblasting) is an option. This technique rapidly removes rust by blasting abrasive materials at the rusty surface with high-pressure air.
Method B: Rust Removal with Abrasive Grits
The type of grit you use can significantly influence how well you can remove rust and prepare the metal surface for finishing. For best results, follow this three-step process:
# Step 1: Coarse Grits (40-80 Grit): Start your rust removal process with coarse-grit abrasives. They're highly effective at tearing through heavy rust and old paint fast. Since they can scratch the metal, they're best used for this initial, aggressive stage.
# Step 2: Medium Grits (100-150 Grit): When most of the rust is removed, move on to a medium grit. These are perfect for getting the metal ready for finishing because they are less aggressive than coarse grits. Medium grits will remove any remaining small rust spots and smooth out the scratches left by coarser abrasives.
# Step 3: Fine Grits (180-220 Grit) and Very Fine Grits (240+ Grit): Fine and very fine grits are ideal for the final touches on metal, as they polish the surface smoothly without being too aggressive. They are essential if you plan to paint or seal the metal, or if you simply want a clean, professional look.
Choosing the Right Abrasive Grain for the Job
For different operations and types of metal, different abrasive grains perform better. Here are some grains that are frequently used to remove rust:
- Aluminum Oxide: This is an excellent, all-purpose material for sanding, grinding, and rust removal from a variety of metal types due to its strength and durability. It is ideal for steel, iron, and other ferrous metals.
- Zirconia: Zirconia is an exceptionally tough and sharp abrasive, surpassing even aluminum oxide in strength. It's ideal for working on harder metals and surfaces that need an aggressive touch. Use zirconia for tasks like preparing very rough surfaces or removing stubborn rust.
- Ceramic: For tough rust removal on different metals, ceramic abrasives are an excellent choice due to their superior durability and long-lasting cutting edge. They can remove significant levels of rust quickly and are an economical option for larger tasks since they last longer than many other abrasives.
Method C: Chemical Approaches
Chemical rust removers offer a no-scrub solution to rust. When choosing one, it’s essential to consider both the type of metal and the severity of the corrosion to ensure effective removal. Always wear a mask and gloves to protect yourself from dangerous vapors, and follow the product's directions carefully.
Method D: DIY Natural Rust Removal Solutions
For an eco-friendly alternative, you can use common household ingredients like vinegar, baking soda, or lemon juice. For instance, you can soak small, rusted items in vinegar overnight and then scrub them clean. A paste made of baking soda and water can be applied to rust patches and washed away after some time. While these techniques may take more time and effort, they are a safer and more environmentally conscious option.
Final Touches
Once your metal object is free of rust, your work isn't quite done. The next step is to smooth the surface and protect it from future corrosion.
# Smoothing the Metal Surface: After rust removal, the surface may feel rough. Use a fine-grit sanding paper or an abrasive pad to smooth it out. Start with a medium grit if necessary and work your way up to a finer grit for the ideal finish.
# Priming and Painting: To prevent rust from returning, apply a protective coating. Start with a metal primer, which not only provides a layer of protection but also helps the paint adhere better. Once the primer is dry, apply a paint that is appropriate for the metal and its environment. Applying thin, even layers protects the metal from moisture and air—the primary causes of rust—and gives it a great finish.
Tips for Maintenance to Avoid Rust
Regular upkeep is necessary to prevent rust from returning to your metal items. By following these maintenance recommendations, you can reduce the chance that the issue will recur.
- Regular Cleaning and Inspection: Get into the habit of routinely inspecting and cleaning your metal items. Wipe them down with a fresh cloth to remove moisture or dirt, paying special attention to joints or crevices where water can hide. Frequent inspections allow you to catch and manage rust early.
- Protective Coatings: Applying a protective coating or treatment is a significant deterrent to rust. Options include rust-inhibiting spray paint, oil, or a silicone-based spray. These coatings form a barrier that is impermeable to oxygen and moisture. Reapply these treatments as needed.
- Environmental Factors: The storage environment you choose can significantly impact rust prevention. Ideally, metal items should be stored in a dry, well-ventilated space. If you are in a high-humidity area, a dehumidifier can help keep the air dry. Outdoor items should be covered or stored, especially during wet or snowy seasons. Additionally, avoid direct contact with the ground, which can cause your metal goods to become damp. Use hooks or shelves to keep items off the floor and away from potential water damage.


