




























Proven Ways to Reduce Surface Roughness in Metal Milling

Surface roughness undoubtedly tops the list of daily concerns for any experienced CNC operator or toolroom machinist. Even if you've got your measurements right and tolerances perfect, items can still emerge from the bed with obvious tooling marks, micro-chatter, or a dull, cracked texture.
Surface finish in precision metalworking isn't just about making something look shiny on the shelf. Poor surface quality can increase mechanical friction in moving assemblies, weaken fatigue strength, and damage seal seats. When milling, you need to balance your cutting dynamics, machine stability, and tool selection to achieve that clean, smooth surface
This blog post guides you through the systematic techniques required to eliminate surface roughness and achieve high-quality finishes in your metal milling projects.
1. Optimize Your Speeds and Feeds Balance
Your potential surface finish (commonly expressed as Ra) is directly determined by the relationship between your feed rate and spindle speed. If your feed rate is too high, the tool leaves visible cusps and scalloped marks on the metal.
But lowering your feed rate too much has its own drawbacks. Instead of cutting cleanly, the tool's edges rub against the material, generating excessive heat and hardening the metal.
Pro Tip: Try running a moderate, controlled feed with a high surface feet per minute (SFM) on each tooth. This helps the tool cut cleanly instead of denting or tearing the metal.
2. Eliminate Built-Up Edge (BUE) Formation
When machining slippery materials like soft aluminum or stainless steel, intense heat and friction can cause tiny layers of metal to adhere to the cutting edge. A built-up edge (BUE) is something that affects the geometry of your end mill, causing sudden gouging and surface damage.
To prevent BUE from ruining your finish:
-
Use High-Pressure Coolant or MQL: Direct fluid flow flushes chips away quickly and reduces localized welding temperatures.
-
Choose Polished or Coated Cutters: End mills with TiB2 (Titanium Diboride) or polished flutes prevent sticky chips from adhering to the cutting zone.
-
Keep Tools Sharp: Dull edges generate unnecessary heat, accelerating BUE development.
When the finish quality suddenly changes, check the machined surface and cutting edge frequently. Material sticking to the cutting edge, uneven polish, or frequent grinding may indicate edge or tool wear. Correcting the underlying cause before resuming production can prevent the same surface problem from spreading to other parts.
3. Control Systemic Chatter and Vibrations
The biggest threat to a flawless surface finish is vibration. Even slight chatter can create noticeable wave patterns on your milled workpiece.
Tool overhang, poor workholding, and machine stiffness are the three main causes of vibration. Since deflection increases cubically with tool length, keeping your tool extension as short as possible significantly increases stiffness. Similarly, to optimally absorb cutting pressure, ensure your fixture plates or vise jaws keep the workpiece close to the cutting area.
Before changing cutting parameters, check the tool holder, collet, and spindle interface for dirt, damage, or excessive runout. When a cutter is not operating concentrically, even a perfect cutter can leave uneven marks on the surface. Maintaining clean mating surfaces and monitoring tool runout can increase cutting-edge life and finish uniformity.
4. Monitor Tool Wear and Cutting Edge Condition
Even with a poor surface finish, a cutting tool can remove material. A worn cutting edge can begin to rub, generating excess heat, increasing cutting pressure, and leaving uneven marks on the workpiece. Regularly check end mills for material buildup, coating damage, chipping, and edge wear. To reduce part variation and avoid unnecessary rework, worn tools can be replaced or reconditioned before their finish quality deviates from the correct standard.
Key Factors Affecting Milling Surface Roughness
Use this reference guide to optimize your setup during production:
|
Machining Variable |
The Problem (When Incorrect) |
Solution for a Smoother Finish |
|
Tool Path Approach |
Rough scallops and gouging on walls/floors |
Separate operations into a heavy roughing pass and a lighter finishing pass, leaving a consistent finishing allowance appropriate for the material, tool geometry, and machining setup. |
|
Cutting Method |
Conventional milling pulls workpieces and causes chatter |
Use Climb Milling whenever possible to shear chips thick-to-thin and reduce friction. |
|
Corner Radius |
Sharp-cornered tools leave deep feed marks |
Choose end mills with a larger corner radius or wiper geometry to flatten out peak lines. |
|
Machine Rigidity |
Spindle play causes micro-vibrations |
Use balanced tool holders (like hydraulic or shrink-fit chucks) and rigid machinery. |
Implement a Two-Stage Strategy: Roughing vs. Finishing
Achieving the desired dimension along with a flawless, polished surface simultaneously can be challenging in flooring. Heavy cuts bend the tool, heat the workpiece, and wear the cutting edges faster.
Your workflow should always be in phase. To effectively remove bulk material, use strong, sharp end mills. For final, shallow passes, use a specialized finishing tool whose geometry is appropriate for the material and finishing process. A consistent and low pressure on the finishing tool ensures a clean, polished result every time.
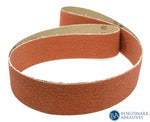
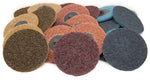
Explore our high quality surface conditioning sanding discs and belts for effective blending, finishing and deburring.
Join Our Newsletter
Sign up to get the latest on sales, new releases and more …Join Our Newsletter
Sign up to get the latest on sales, new releases and more …Shop Categories
Recent Articles
- Proven Ways to Reduce Surface Roughness in Metal Milling
- What is Metal Shearing: Process, Applications, and Finishing
- 10 Essential Metal Fabrication Processes Explained
- Essential Metal Fabrication Tools: The Only Checklist You’ll Ever Need (Jason Hurst Approved)
- How To Deburr Metal
- A Step-By-Step Guide To Remove Spot Welds With Air File Sander
- How to Remove Mill Scale: Step-by-Step Guide
- The Role Of Abrasives In Modern Construction: Beyond The Surface
- Exploring The Art Of Metal Sculpting With Abrasives
- Abrasives in Renewable Energy: Applications In Solar And Wind Industries
Featured Products
-
 746 Reviews
4-1/2" x 7/8" T29 Zirconia High Density Flap Disc - 10 pack
$25.19
-
 738 Reviews
4-1/2" x .040" x 7/8" t1 premium thin cut-off wheel - 25 pack
$20.88
-
 220 Reviews
4-1/2" x 7/8" T27 Zirconia High Density Flap Disc - 10 pack
$25.19
-
 380 Reviews
6" x .045 x 7/8" T1 Premium Thin Cut-Off Wheel - 25 pack
$27.29
-
 55 Reviews
Nonwoven 6" X 9" Scuff, Clean & Finish Hand Pads
$0.83
-
 123 Reviews
4-1/2" x 1/4" x 7/8" T27 Depressed Center Grinding Wheel - 25 pack
$28.34


Blog Categories
- Abrasives
- Sanding
- Grinding Deburring Finishing
- Safety and Cleanliness
- Metal Working
- Selecting Tools And Equipment
- Wood Working
- Art And Design
- Diy Projects
- Industry 4.0
- Buffing
- Cutting Tools
- Carbide Burrs
- PPE
- Wire Brushes
- Bonded Abrasives
- TIG Electrodes
- Wire Wheels
- Bits
- Diamond Blades
- Power Brushes
- Product Reviews
- Grinding
- Finishing
- Industrial Cleaners