Sanding Epoxy Resin Without Clouding: Cure Stages, Grit Paths, and Heat Control

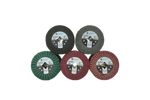
Sanding epoxy resin can be a crucial step in achieving a flawless, glass-like finish on countertops, river tables, or art pieces. However, it's also where many projects go wrong, leading to irreversible defects like clouding, pigtails, and swirl marks. The key to success is understanding three critical factors: the resin’s cure stage, the correct grit ladder, and meticulous heat control. Using the right sanding belts and discs is essential for a professional workflow. This guide provides a professional, defect-prevention workflow to ensure your epoxy project turns out clear.
Identify the Cure Stage
Sanding at the wrong time is the number one cause of failure. Epoxy goes through three main cure stages:
# Green Stage (24-48 hours): The resin is solid but soft and gummy. Sanding at this stage will gum up your sandpaper and create deep, difficult-to-remove gouges.
# Sandable Stage (48-72 hours): The resin is firm enough to be sanded without gumming. A thumbprint test will leave no mark, and a light sanding will produce fine, powdery dust. This is the optimal window for sanding.
# Full Cure (7-30 days): The resin has fully hardened. At this stage, it will be harder to sand, but it is necessary for achieving a high-gloss final finish.
Required Tools
Choosing the right tools is essential for a flawless finish. Using a random orbital sander is recommended for a consistent, swirl-free pattern.
1. Orbit Size: A smaller orbit (2.5mm or 3/32") on your sander provides a tighter, more refined sanding pattern, which is ideal for finishing and polishing.
2. Pad Interface: Use an interface pad between the sanding disc and your sander. This foam cushion allows the pad to conform to slight curves and prevents hard edges from digging into the epoxy, which causes pigtails.
3. Vacuum Extraction and Water Use: For dry sanding, use a sander with vacuum extraction to immediately remove dust and prevent it from caking on your abrasive. For wet sanding, a spray bottle of water will act as a lubricant, reducing friction and preventing heat buildup.
Pro Tip: Wet sanding is highly recommended for all stages of sanding epoxy to keep the surface cool and prevent dust from becoming airborne. Use a high-quality ceramic sanding belt for consistently good results.
Grit Ladders by Scenario
The grit you start with depends on the epoxy's thickness, any existing defects, and the desired final finish.
- Flood Coat (Thick Pour): Start with 180-220 grit to flatten the surface and remove any minor imperfections. Progress through 400, 600, 800, 1000, 1500, and 2000 grit to gradually remove scratches and prepare the surface for polishing.
- Inlay or Thin Coat: Start with a higher grit, such as 320 grit, to avoid sanding into the substrate. Proceed through the same ladder up to 2000 grit.
- Edge Repairs: Use 800 grit to clean up the edge and a 1000 grit and higher to smooth it out before a final polish.
Using coated abrasives and hook and loop discs allows for uniform sanding and easy changes of grit.
From Matte to Clarity: The Polishing Stage
Once you have a uniform, matte surface from your final sanding grit, it’s time to bring back the shine with a compound and a polisher.
Compound/Pad Pairing
Use a medium-cut compound with a foam compounding pad, followed by a fine-cut compound on a polishing pad. The compound’s abrasives will work to level the microscopic sanding marks.
RPM and Heat Control
Keep your polisher's RPM low (1,000-1,500 RPM) to manage heat. Excessive heat will cloud the resin and can cause irreversible damage. Keep the pad moving constantly across the surface and wipe off residue frequently.
Browse our selection of compounds and foam pads to get a flawless finish.
Troubleshooting Common Issues
- Pigtails: These are small, circular scratches caused by debris caught under the sanding pad. Use a dust extraction system and keep your pad clean.
- Swirl Haze: Caused by inadequate polishing after sanding. You need a finer grit or a more aggressive compound/pad combination to remove the final sanding marks.
- Cloudy Sections: The most common cause is overheating the resin. If the resin turns white or opaque, it's a sign of permanent damage from excessive heat. The only solution is to sand back to the original surface and start over, focusing on heat management.
FAQ
Q: Can I use a regular sander for epoxy?
A random orbital sander is ideal. A standard belt sander or a vibrating sander is not suitable, as they will leave deep, difficult-to-remove scratches.
Q: Do I need to wet-sand the whole project?
Wet sanding is recommended, especially for the finer grits (1000 and up). It keeps the surface cool, prevents dust from clogging the sandpaper, and provides a smoother finish.
Q: How do I remove amine blush before sanding?
Amine blush is a waxy film that can form on an epoxy's surface. It should be removed with mild soap and warm water, followed by light scuff sanding, before applying a new coat or polishing.
Q: Can I re-coat over a sanded surface?
Yes, you can. After sanding, clean the surface thoroughly with denatured alcohol to ensure no dust remains. The sanded surface provides a perfect mechanical bond for a new coat of resin.


