Best Sanding Tools for Curved Surfaces: Handheld and Power Tools List

Sanding curved surfaces is challenging when compared to working on flat surfaces. The radii and curves require tools that apply uniform pressure, conform well, and provide a smooth finish without changing the desired shape. Choosing the right abrasive equipment for sanding curved surfaces is essential to getting results of professional quality, regardless of your level of experience—whether you're a skilled metalworker, an experienced carpenter, or a do-it-yourself enthusiast working on a restoration project.
This article will cover the wide range of abrasive tools available, particularly those made or modified to deal with curved surfaces. We'll examine the benefits and drawbacks of hand and power tools, giving insights into which option works best in particular situations. Knowing the features of each tool and the fundamental methods will enable you to handle the challenges of curved sanding and provide the flawless, exquisitely prepared surfaces your projects require.
Hand Sanding Tools
To sand curved surfaces, hand sanding tools provide an amount of control, skill, and versatility that is frequently required, mainly for complex details or fragile materials. The tactile feedback and accurate application make hand sanding a vital skill, even requiring more manual labor than power sanding. The following is a list of a few hand-sanding tools for sanding curved surfaces:
1. SANDPAPER
The essential tool for sanding curved surfaces is still Sandpaper, which is simply abrasive grit attached to a flexible backing because of its inherent adaptability and versatility. sandpapers can be easily folded, torn, wrapped, or even crumpled, enabling them to fit a wide range of shapes, from carefully sweeping curves to tight, complex details. This manual flexibility gives the user better control over pressure application and can precisely target particular areas on the curved surfaces. Additionally, a wide range of sandpaper in several grits, from coarse material removal to ultra-fine polishing, is necessary to move through the sanding process and get the required smoothness on almost any material.
Sandpaper's basic versatility and price guarantee its ongoing importance as a key abrasive for hand-shaping, refining, and finishing curved surfaces, even while other specialized tools provide particular advantages.
2. FLEXIBLE SANDING SPONGES/PADS
Flexible sanding sponges and pads provide significant benefits when dealing with curved surfaces by integrating the abrasive power of sandpaper with an intrinsically conformable and frequently more pleasant form factor. These are made of foam or sponge materials with abrasive grains attached to their surfaces. They easily conform to mild to moderate curves, ensuring more uniform contact and pressure distribution compared to rigid blocks or directly held sandpaper.
3. CONTOUR SANDING GRIPS/BLOCKS
These specialized hand tools make sanding curved surfaces easier and more consistent. They have curved or flexible bases that hold sandpaper firmly, enabling them to better match the curves you're working on. Offering a more steady grip and evenly dispersing pressure, they help avoid flat spots and provide a smoother, more controllable sanding experience on different curved shapes.
4. HANDHELD METAL FILES
Handheld metal files are essential for accurately shaping, refining, and smoothing curved surfaces, mainly wood or metal. These thin tools contain rows of sharp teeth specifically made to eliminate material with controlled strokes. They come in several shapes, including flat, round, half-round, and triangular, and with different levels of coarseness. They are fantastic for adjusting curves, fixing flaws, and attaining a precise, smooth finish on curved workpieces because of the direct control that hand filing provides, which enables careful material removal.
5. FLEXIBLE SANDING BOARDS
Flexible sanding boards are mainly made to deal with larger or more intricate curved surfaces with exceptional ease. These boards are made from thin, flexible materials with the distinctive ability to bend and fit perfectly to various shapes, starting from gentle arcs to more visible bends. Flexible sanding boards are perfect for getting smooth, consistent finishes on large curved panels and their parts by offering certain benefits in coverage and versatility.
Power Sanding Tools
Although hand sanding provides accuracy, power tools, on the other hand, speed up the process of sanding curved surfaces, mainly for larger areas or more aggressive material removal. To safeguard the required contours and to prevent undesired flat spots or gouges, it is crucial to use power tools effectively on curves that require careful techniques. Following is the list of some of the best power tools for sanding curved surfaces:
1. BELT SANDERS
Belt sanders are typically made for quick material removal from flat surfaces, although they can also be used on larger, slightly curved surfaces like dowels or furniture edges. They are highly effective on cylindrical shapes. Additionally, specialist solutions for effectively and uniformly sanding these rounded shapes are provided by specialized tube sanders, which include a belt that fits around the diameter of a cylindrical workpiece. By being proficient in these specialized methods, belt sanders may be used for more than just flat surfaces; they can be used to abrasively finish some kinds of curved work more quickly.
2. SURFACE CONDITIONING TOOLS/HANDHELD DRUM SANDERS
Surface conditioning tools, which frequently resemble portable drum sanders, are installed with rotating drums that can hold several abrasive attachments like abrasive sleeves, non-woven nylon flaps, and brushes. These tools are perfectly suitable for smoothing, blending, and finishing large curved surfaces, removing material effectively, and preparing the surface for the following treatments. They have flexible attachments that can easily fit into modest curves, making them very helpful for tasks like polishing or removing paint or varnish from curved surfaces or providing a uniform finish to uneven surfaces. By choosing the right drum type and grit and applying consistent overlapping passes, these tools can drastically accelerate the generation of a refined surface on broad curved areas.
3. CARTRIDGE ROLLS AND SPIRAL BANDS
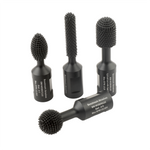
Cartridge rolls and spiral bands are essential abrasive attachments specifically made for rotary power tools like die grinders, drills, and flexible shaft machines. This makes them highly suitable for sanding complex curves, tight interior corners, and other difficult-to-reach areas. For precise material removal and refined finishes in tight spots, cartridge rolls and spiral bands deliver concentrated abrasive action. Use them to smooth curved pipes, polish intricate carvings, or deburr internal curves where larger tools can't go.
4. RANDOM ORBITAL SANDERS
Random orbital sanders are highly suitable for working on flat surfaces. Still, with the use of certain flexible backing pads, they may be modified to sand mild to moderately curved surfaces. Compared to conventional stiff pads, these pads have a degree of flexibility that enables the sanding disc to better adhere to minor features.
The random orbital motion, defined by both rotation and oscillation, helps avoid swirl marks, resulting in a smoother overall finish on the curved area.
For larger, subtle curves, random orbital sanders can effectively replace hand sanding. Achieve this by using a light touch, moving consistently along the curve, and choosing a flexible pad that matches the surface's radius.
Why Does Sanding Curved Surfaces Require Special Tools
Sanding curved surfaces is challenging, hence generating a need for specialized tools. Standard sanding tools are impractical in sanding curved surfaces due to the difficulty of applying constant pressure and contact over shapes, resulting in uneven sanding, flat spots, and an inadequate finish. Curves require tools that adjust to different radii, provide consistent abrasion, and avoid changing the desired shape. These specialized tools are made with flexible designs, distinctive shapes, or adjustable mechanisms that let them reach tiny or complex spaces by consistently applying pressure.
This specific design guarantees effective material removal, avoids undesired surface distortions, and eventually makes it possible to produce a smooth, uniform, and visually appealing finish that would be challenging, if not impossible, to accomplish with standard sanding tools alone.
BENEFITS AND DRAWBACKS OF USING HAND TOOLS FOR CURVED SURFACES
The following are the benefits of using hand tools:
- Control & Precision: Hand sanding provides maximum power and precision for keeping curve integrity and producing fine finishes.
- Adaptability to complex shapes: power tools may find it challenging to reach complex shapes, inside corners, and highly tight spaces or curves without causing damage. Sandpaper and flexible hand tools are perfectly suitable for dealing with these spaces.
- Gentle on Fragile Materials: Hand sanding is a gentler method that minimizes the risk of over-sanding, gouging, or damaging fragile materials.
- Lower Initial Cost: The initial cost of handheld tools is lower than that of power tools.
-
No Power source required: hand tools can be used anywhere without having any power source or batteries.
The following are the drawbacks of hand sanding tools:
- More labor-intensive and time-consuming: hand tools take time and labor when sanding large curved pieces.
- Possibility of Inconsistent Results: Because hand pressure and stroke vary, achieving a precisely uniform finish across vast curved sections might be challenging.
- Limited Material Removal Rate: Using hand tools to aggressively shape curves or remove large amounts of material is slower and more challenging.
- Dust management: Although hand tools generate less dust than power tools, they still produce dust, requiring careful health and safety management.
BENEFITS AND DRAWBACKS OF USING POWER TOOLS FOR CURVED SURFACES
The following are the benefits of using power tools:
- Increased speed and efficiency: power tools are capable of sanding large curved surfaces quickly compared to hand tools
- More consistent results: Power sanders provide more consistent results than hand sanders.
- Reduce physical efforts: Power tools can help reduce physical stress, which results in increased productivity and longer sanding sessions.
- Dust collection system: Most power sanders are equipped with a dust collector, which helps minimize dust and ensures a clean and healthy environment.
The following are the disadvantages of power tools:
- Potential for over-sanding and damage: due to their power and speed, these tools are prone to damage and over-sanding if not handled carefully.
- Less Control and Finesse: Because power tools provide less tactile input, detecting minute flaws and taking more expertise to keep the correct curve can be more difficult.
- High initial cost: power sanding tools and their accessories generally have a high initial cost compared to hand tools
- Generate noise and vibration: power sanding tools generate noise and vibrations, requiring hearing protection
- Require access to a power source: power tools normally require access to electricity or batteries
- Risk of injury: Power tools can potentially cause severe injuries if not handled carefully and without protective gear.
TIPS FOR SANDING CURVED SURFACES
The following are some valuable tips to consider when sanding curved surfaces:
- Gradual Grit Progression: Start with a coarser grit to shape the curve, then gradually switch to finer grits for a smooth, even finish.
- Sand in the direction of the curve: This ensures the preservation of the original shape and prevents cross-grain scratches, mainly on wood.
- Apply even pressure: Ensure to apply even pressure or constant pressure to avoid flat spots or unevenness.
- Consider the material: Always consider the material while sanding. Softer materials require less aggressive materials and light pressure.
- Track your progress: To track your progress, frequently feel the surface for smoothness and imperfections. Good lighting is also key to revealing uneven spots.


