


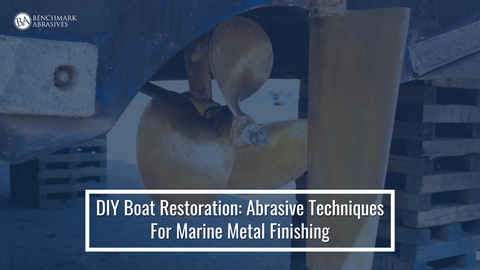
DIY Boat Restoration: Abrasive Techniques For Marine Metal Finishing
Although your dependable boat has seen its fair share of mishaps, from sailing through rough seas to lounging in the sun, time and the elements can wear down its stainless steel surfaces. It's easy to bring back the luster of your stainless steel. Your boat will shine like new quickly with a few easy suggestions and some elbow work.
TIP 1: USE A SOFT CLOTH AND BUFFING PRODUCTS TO RESTORE SHINE
Over time, dirt and salt residue have probably built up on your stainless steel railings, studs, and other fittings. All you need to do to counter this is use a soft cloth and a buffing product. Steel wool and wire brushes are abrasive items that should be avoided because they can harm stainless steel's fragile surface.
Although stainless steel will inevitably have scratches over time, you shouldn't stress about trying to avoid them entirely. Stainless marine-grade steel is not meant to look perfect; it is intended to be solid and sound. Nonetheless, buffing chemicals can assist in removing the oxidized coating and restoring some of the luster to your stainless steel if you want to give it back its sheen.
TIP 2: USE ELECTRO-PASSIVATION TO ERADICATE RUST
Do not panic if your stainless steel has succumbed to the dreaded rust. Stainless steel frequently rusts, particularly in the challenging maritime climate. Thankfully, rust can be eliminated, and the protective layer on your stainless steel may be restored with the help of a tested electro-passivation treatment.
One popular method of metal finishing that efficiently stops surface corrosion is electro-passivation. The electro-passivation process for stainless steel begins with the components submerged in hydrochloric and nitric acids. This solution exposes a new, corrosion-resistant surface by eliminating the metal's surface and any impurities from free iron.
TIP 3: USE EXPERT METAL POLISHING SERVICES TO GET A MIRROR FINISH
It's time to restore the shine and quality of your stainless steel once you've correctly cleaned it and dealt with any corrosion. Although polishing surfaces yourself can be successful, a truly mirror-like finish calls for specialized knowledge and tools.
Skilled specialists meticulously hand-polished each item to guarantee uniform coverage and a flawless finish. Professionals use fine-grit sandpaper to erase tenaciously shines from surfaces by carefully polishing them to remove any last traces of imperfection.
After finishing, the experts remove any remaining polish residue from the polished surfaces by thoroughly cleaning and drying them. The end product is a brilliant, mirror-like shine that will improve your boat's overall look and inspire pride in its immaculate state.
HOW DO YOU GIVE A SAILBOAT A SHOWROOM FINISH THROUGH BURNISHING?
Give your sailboat a burnished finish to showcase it to its full potential. Your yacht will gleam like new after completing this quick and straightforward operation, impressing your neighbors and friends. On the other hand, a sailboat finish that is improperly burnished will be scratched, chipped, and dull.
The practice of preserving and caring for a sailboat's hull is called burnishing. The sailboat's hull, the outside layer of protection covering the internal mechanisms, can be harmed by sun exposure, sea salt, and wear and tear by eliminating dirt, barnacles, and other marine vegetation; burnishing aids in maintaining the hull's integrity. It also aids in shielding the hull from aging and additional damage.
Burnishing is a hand- or machine-operated operation that usually entails polishing the hull with a soft cloth or brush. Additionally, specific sailboats have a unique coating that protects and facilitates hull cleaning. Burnishing is a crucial component of sailboat upkeep that can help a vessel last longer. You may have a sailboat that looks brand new out of the showroom in only a few easy steps!
STEP 1: ASSEMBLE YOUR SUPPLIES
To properly burnish a sailboat, you will want the following supplies:
- Burnishing Agent.
- Pads for burnishing;
- High-Speed Polisher
STEP 2: APPLY THE COMPOUND
Now that you have everything you need, let's get to burnishing! Start by covering the whole boat with a thick layer of burnishing compound. Make sure to work in small parts to prevent the compound from drying up before you can work it in. After covering the entire area, give the compound fifteen minutes to sit.
STEP 3: POLISH THE SURFACE
It's time to begin polishing after the compound has had time to solidify. First, fit your polisher with a burnishing pad and set the speed high. Once the entire boat's surface is uniformly polished, slowly slide the polisher back and forth over it. You ought to notice a noticeable difference in the finish in just a few minutes! Before proceeding to step four, allow the area to dry for approximately one hour.
STEP 4: APPLY A WAX ON THE SURFACE
Wax application is the final step in burnishing your sailboat. This will assist in shielding the recently polished surface from grit and UV radiation. After liberally applying wax, you have to polish the boat's surface with another clean burnishing pad. After the wax has dried for around fifteen minutes, rub it off with a gentle cloth. That's it, too! Now that your finish is showroom-quality, you may enjoy it.
EXTRA ADVICE ON KEEPING YOUR METAL LOOKING GREAT
- FREQUENT CLEANING: To avoid the accumulation of dirt and salt residue, clean your stainless steel regularly using a mild soap and water solution.
- PROTECT AGAINST HARSH CHEMICALS: To prevent corrosion and damage to the protective coating, keep your stainless steel away from harsh chemicals like bleach and chlorine.
- WAX FOR FURTHER PROTECTION: Consider giving your stainless steel a coat of marine-grade wax. This will help preserve its luster and add protection against corrosion.
CONCLUSION
With these simple tips, your stainless steel will shine like the stars in no time, and you will be ready for your next wave excursion. Recall that regular maintenance is the key to maintaining your boat's finest possible appearance and long lifespan.
Join Our Newsletter
Sign up to get the latest on sales, new releases and more …Join Our Newsletter
Sign up to get the latest on sales, new releases and more …Shop Categories
Recent Articles
- 9 Kickass Metal and Wood Home Shop Projects to Flex Your DIY Skills
- How To Cut Carbon Arrows
- How to Remove Rust from Knives: 7 Simple Methods
- How To Fix Scratches On Car Wheels
- How To Polish A Car - Step by step guide
- Stripping Wood Vs Sanding Wood
- Painting Your Car: Essential Steps, Supplies, and Pro Tips
- Build Your Own Cornhole Boards: A Step-by-Step Guide
- Headlight Restoration That Lasts: Grits, Coatings, and Real-World Durability
- How To Sharpen A Knife Without A Sharpener
Featured Products
-
 746 Reviews
4-1/2" x 7/8" T29 Zirconia High Density Flap Disc - 10 pack
$25.19
-
 738 Reviews
4-1/2" x .040 x 7/8" T1 Premium Thin Cut-off Wheel - 25 pack
$20.88
-
 220 Reviews
4-1/2" x 7/8" T27 Zirconia High Density Flap Disc - 10 pack
$25.19
-
 380 Reviews
6" x .045 x 7/8" T1 Premium Thin Cut-Off Wheel - 25 pack
$27.29
-
 123 Reviews
4-1/2" x 1/4" x 7/8" T27 Depressed Center Grinding Wheel - 25 pack
$28.34
-
 55 Reviews
Nonwoven 6" x 9" Scuff, Clean & Finish Hand Pads
$0.83


Blog Categories
- Abrasives
- Sanding
- Grinding Deburring Finishing
- Safety and Cleanliness
- Metal Working
- Selecting Tools And Equipment
- Wood Working
- Art And Design
- Diy Projects
- Industry 4.0
- Buffing
- Cutting Tools
- Carbide Burrs
- PPE
- Wire Brushes
- Bonded Abrasives
- TIG Electrodes
- Wire Wheels
- Bits
- Diamond Blades
- Power Brushes
- Product Reviews
- Grinding
- Finishing
- Industrial Cleaners