Precision DIY Woodturning: Creating Unique Wooden Bowls With Abrasives

Greetings from the fascinating realm of bowl carving! Imagine yourself creating a lovely wooden bowl with your hands, surrounded by the earthy, warm aroma of wood shavings and the soft sound of chisels dancing on timber.
Bowl carving is an age-old craft that evokes memories of your forefathers in woodworking and has stood the test of time. Acquiring the skill of carving a bowl opens up a world of creative expression and sound craftsmanship, enabling you to make stunning objects that straddle the line between aesthetics and functionality.
We will go on a captivating journey through the core of bowl creation with this comprehensive tutorial, uncovering the mysteries of this age-old art. We have everything you need, whether you're an experienced carver with wood chips in your blood or a curious beginner hoping to pick up some skills with the chisel!
WHAT SUPPLIES ARE NEEDED FOR CREATING A WOOD BOWL?
Similar to making a delicious salad, carving a wooden bowl requires the correct elements to produce a work of art. Before you begin carving a wooden bowl, make sure your toolkit contains these necessary items:
WOOD
Choosing the proper wood species is the cornerstone of your wooden salad bowl. Select wood types that are robust, well-seasoned, and free of cracks and knots.
WAX OR FINISHING OIL
In order to maintain its natural beauty, your wooden bowl requires maintenance. If you want to use the bowl for cooking, food-safe oils or beeswax are great options.
BRUSHES
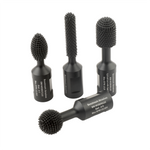
You'll need wire brushes as your reliable allies on this carving journey. They'll assist you in evenly applying the wax or finishing oil, guaranteeing a glossy and smooth surface.
WORKBENCH OR ANY OTHER ROBUST WORKSPACE.
A bowl demands steadiness and accuracy when carving. Choose a table or workbench that will serve as a sturdy base for your enjoyable carving project.
BOWL DESIGN
Using a bowl pattern can be a helpful starting point, whether you're an ambitious carver or want to get your creativity going. You can make your pattern or locate pre-made ones online, depending on the style you choose.
WHAT EQUIPMENT IS NEEDED TO CARVE A WOODEN BOWL?
A wooden bowl requires a delicate balance of skill and imagination to carve. You will also need the appropriate wood carving tools to complement your movements in order to do this craft. The bowl carving tools required to create an exquisite wooden salad bowl are listed below.
CARVING GOUGES
These multipurpose implements are needed for engraving your wooden bowl's exterior and interior. Carving gouges come in a variety of sizes and shapes that let you make distinctive contours and textures.
CARVING CHISELS
Carving chisels are the instruments of choice for precise work and refinement. They assist you in creating the elaborate designs, delicate edges, and thin lines that really set your bowl apart.
CARVING KNIFE
Similar to the all-in-one instrument for bowl carving is the carving knife. It is an essential tool in your carving toolbox because it can be used for both fine detailing and rough shaping.
HOOK KNIFE
A hook knife is essential for hollowing out the interior of your bowl. You can easily scoop and shape the bowl's form with its curved blade.
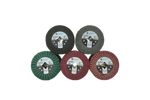
SANDPAPER
Reaching that polished and smooth surface is the final touch on your bowl. You can smooth down any uneven areas with sandpaper of different grits, making your bowl a pleasure to touch and look at.
SAFETY GEAR
In any art, safety is of the utmost importance, and bowl carving is no exception. Remember to arm yourself with goggles, dust masks, safety tape, and other protective gear, like a carving apron that will shield you from flying debris and wood chips.
NOTE: If you want to learn more about bowl carving, consider putting a bowl carving adze in your toolbox. This specialized tool lets you create more profound, more dramatic curves and shapes because it is made for practical hollowing-out activities.
COMPREHENSIVE GUIDE FOR CREATING BOWLS
A wooden bowl requires both expertise and imagination to create; each tool stroke gets you one step closer to your masterpiece. Every stage of the process, from choosing the ideal wood to applying the finishing touches, contributes to creating a stunning bowl.
We'll walk you through the fascinating process of carving a wooden bowl using hand tools if you're interested in learning about the genuine and traditional methods of bowl art. So, are you ready to get started?
STEP 1: SELECT THE PROPER WOOD FOR CREATING A BOWL
Selecting the finest wood for wood carving is the cornerstone of any well-crafted wooden bowl. Select wood that has been well-seasoned and has straight, even grains since it will be easier to carve and less likely to split. Due to their strength and beauty, wood types like walnut, oak, or cherry would make great choices. Make sure the wood you have chosen is thoroughly dry because green or recently cut wood may warp or break as it dries.
STEP 2: CREATE THE WOODEN BOWL PATTERN TEMPLATES
It would help if you had a plan for your bowl before you make your first cut. Make a paper template or design in the shape of the bowl you want. You may accomplish your desired design and keep consistency with the aid of this visual guide.
STEP 3: GET THE WHITTLING TOOLS READY
Prepare your wood bowl carving tools before you set off on this wooden journey. Make sure your hook knife, chisels, knives, and carving gouges are sharp and ready to use. In addition to producing unsatisfactory results, dull tools may also put your safety in danger.
STEP 4: TRACE OR DRAW THE BOWL'S OUTLINE INTO THE WOOD
Having prepared your template, place it on the wood. Inhale sincerely, keep your palm firm and draw the contour of the bowl on the wooden blank.
STEP 5: SAFEGUARD THE WOOD
The most important thing is safety. Using clamps or other appropriate techniques, fasten the wooden blank to your work surface. A stable configuration reduces the chance of unintentional slips and guarantees comfort.
STEP 6: ROUGH CARVING
The thrilling process of toughening up your wooden salad dish is about to begin. The general shape of your carved bowl will gradually become visible as you remove the excess wood with your carving gouges and chisels.
STEP 7: HOLLOWING THE BOWL
It's time to craft the interior, the bowl's soul. Using a hook knife and your gouge, hollow out the bowl's center. As you carefully and systematically work, pay attention to the depth and curve that you wish.
STEP 8: SHAPING AND SMOOTHING
Once the basic carving is finished, concentrate on smoothing out the bowl's surface and shape. To create clean lines, elegant curves, and seamless transitions, use your carving tools. This is the stage where the final polished look of your wooden bowl begins to take shape.
STEP 9: SCULPTING THE NECKLACE
If you want to elevate your bowl even more, think about creating a beautiful design on the rim or the necklace. You can showcase your taste and flair by experimenting with different patterns, ranging from primary notches to elaborate swirls.
STEP 10: LAST TOUCHES
Nearly there! Sandpaper can be used to smooth away any leftover tool marks, jagged edges, or flaws. Achieving the ideal surface and texture with the finishing touches will make your hand-carved wooden bowl a pleasure to handle and observe.
STEP 11: WOOD FINISHING
Should your carved wooden bowl be used for culinary explorations, think about applying food-grade oil and wax to it. These treatments guard against stains and dampness while enhancing the wood's inherent beauty. Select finishes that have been authorized to handle food to guarantee safety.
Using industrial hand cleaner after woodworking removes sawdust, resin, and chemicals, prevents skin irritation, and ensures thorough cleaning, maintaining hand health.
CONCLUSION
You are now equipped with the knowledge and abilities necessary to start cutting wooden bowls! Remember that there are countless options to consider: big and small, patterned and simple, you name it!
While you get more proficient at this skill, remember to take your time, practice safety, and let your creativity lead the way while you carve. Every wooden bowl that you have carved by hand is an original piece of art that demonstrates your artistic ability and love of woodcarving.


