


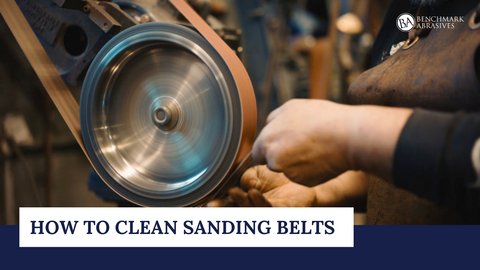
Ways To Clean Sanding Belts Make It last longer

Sanding belts are the best tool for stripping, molding, and granulating things down rapidly. In any case, the belts can get stopped with residue and buildups from old completions, paints, sleek woods, metal, and sometimes they wear out. However, removing the clogged material can be costly. Over the long haul, your Sanding Belts will obstruct, particularly if you work with resinous woods, paint, or milder metals. The heat generated by the sanding system can make these materials relax, adhere to the belt surface, and gather residue and garbage. All of that stopped-up residue can scratch or consume the workpiece and leave an inadequate completion.
Luckily, rough sanding belts can be cleaned and reused. The time you spend cleaning up all of that developed material will be negligible, contrasted with the expense of a substitution belt.
How to Clean Sanding Belts?
Belt Sander Cleaning Stick
Belt Sander Cleaning Stick explicitly intended for sanding belts. They are produced using elastic and resemble a monster pencil eraser. Cleaning sticks can come in various sizes according to the different belt sanders available. Our cleaning sticks are not expected for use on a wide belt or transport type sander.
- If you have a bigger sander, open the belt lodging first so you can get to the belt.
- You don't need to eliminate it; essentially lift and secure the lodging.
- Handheld sanders can be braced topsy turvy onto your work table utilizing a tight clamp, with the goal that the belt faces the roof.
- Ensure that it's safely set up before you turn it on, as the sander will move around during the cleaning system.
- Turn on the sander and run the cleaner stick across the belt surface, covering an inch-wide area at a time.
- The grating will consume the stick and eliminate the stuck-on buildup from between the coarseness.
Continue to move it until all grime and development have been cleaned up. Please ensure not to utilize an excess of power, as the stick could get on the moving belt.
When your sanding belt looks spotless, shut the machine off and look at the grating for any remaining residue. If you see, develop, betray and hold the cleaner stick against the filthy region. It should clear up after a couple of pivots, yet if it doesn't, it very well might be an ideal opportunity to supplant the belt.
Sanding Belt Liquid Cleaner
If you utilize a wide belt sander, you can purchase claim to fame fluid cleaners to eliminate tenacity and grime from paper and fabric-supported belts. A large portion of them is water-based antacid cleaners that are biodegradable and non-combustible. When applied, they emulsify the development so that it's simpler to eliminate.
- To apply the cleaner, relax the strain on the belt. Then, at that point, turn it cautiously while showering the arrangement on the grating and brush the soil off utilizing an air house.
- On the off chance that the belt is as yet messy, let it dry and rehash.
For poly-sponsored, 100% waterproof belts, you can utilize a non-poisonous cleaner like Simple Green. Ensure that the belt backing is anything but a poly-cotton mix, or it might extend and lose its shape. Apply the cleaner while the belt is standing up (not lying level against a surface) and let it dry for something like two days before utilizing the belt once more.
Old Shoe Method
We wouldn't suggest this for bigger modern machines like a wide belt sander. However, you can utilize the elastic soles of shoes to clean belts for more modest processors or belt sanders. The elastic sole of your shoe will work similarly to an elastic cleaning stick.
After eliminating and discarding the shoelace, brace your sander safely topsy turvy on your workbench. Then, at that point, power it on, gently press the shoe sole against the running belt, and move it gradually from one side to another until the belt surface is spotless. For best outcomes, utilize a crepe-sole shoe.
Some Tips for Make Sanding Belts Last Longer
When your sanding belts are perfect, balance them on exceptional molding racks close to your belt sander, with the goal that they remain accustomed to your studio's encompassing temperature and mugginess. These racks ought to:
- Have non-metallic holders that are no less than 4" in breadth and 4" from the shop divider.
- Keep the belts no less than one foot off the floor.
- Guarantee the hanging belts don't contact one another.
- Stay away from direct openness to daylight and any of the components.
Join Our Newsletter
Sign up to get the latest on sales, new releases and more …Join Our Newsletter
Sign up to get the latest on sales, new releases and more …Shop Categories
Recent Articles
- 1X30 Sanding Belts for Metalworking & Knife Making
- Why Sanding Belts Stop Cutting Efficiently
- Best Sanding Discs for Automotive Paint Preparation
- How to Change Sandpaper on a Drum Sander
- Sanding Drums for Metal, Finishing, and Deburring
- Sanding Disc Accessories: Backing Pads & Disc Tools
- Random Orbital Sander
- Ways to Remove Rust from Metal
- Select the Right Sanding Belt for Your Next Project
- How Humidity Impacts Sanding Belts
Featured Products
-
 746 Reviews
4-1/2" x 7/8" T29 Zirconia High Density Flap Disc - 10 pack
$25.19
-
 738 Reviews
4-1/2" x .040 x 7/8" T1 Premium Thin Cut-off Wheel - 25 pack
$20.88
-
 220 Reviews
4-1/2" x 7/8" T27 Zirconia High Density Flap Disc - 10 pack
$25.19
-
 380 Reviews
6" x .045 x 7/8" T1 Premium Thin Cut-Off Wheel - 25 pack
$27.29
-
 123 Reviews
4-1/2" x 1/4" x 7/8" T27 Depressed Center Grinding Wheel - 25 pack
$28.34
-
 55 Reviews
Nonwoven 6" x 9" Scuff, Clean & Finish Hand Pads
$0.83


Blog Categories
- Abrasives
- Sanding
- Grinding Deburring Finishing
- Safety and Cleanliness
- Metal Working
- Selecting Tools And Equipment
- Wood Working
- Art And Design
- Diy Projects
- Industry 4.0
- Buffing
- Cutting Tools
- Carbide Burrs
- PPE
- Wire Brushes
- Bonded Abrasives
- TIG Electrodes
- Wire Wheels
- Bits
- Diamond Blades
- Power Brushes
- Product Reviews
- Grinding
- Finishing
- Industrial Cleaners