




























How to Polish Stainless Steel: A Complete Guide

Stainless steel shows up everywhere: kitchen appliances, automotive trim, railings, knives, restaurant equipment. That’s because it's strong, corrosion-resistant, and holds up under heat. But that signature shine fades with age, use, and exposure. Polishing brings it back.
This guide walks through how to polish stainless steel from a dull, scratched starting point to a mirror finish, including the buffing sequence that gets you there and how to keep already-polished pieces looking new.

Why Polish Stainless Steel?
-
Aesthetics: restores the glossy, reflective surface finish and improves how it looks paired with buffing.
-
Corrosion resistance: polishing reduces the small surface fissures where rust and pitting start.
-
Contaminant removal: clears embedded surface impurities that a wipe-down alone won't touch.
Choosing a Finish
The finish you're after determines the whole process: grit progression, wheel type, and compound.
|
Finish |
Look |
Typical grit / abrasive |
Best for |
|
Brushed |
Fine parallel lines, low glare |
150–240 grit belts, drums, or very fine nonwoven abrasive |
Bright indoor lighting, architectural panels |
|
Matte / satin |
Flat, non-reflective |
220–240 grit coated abrasive or nonwoven belt/drum/disc |
Workbenches, sinks, functional surfaces |
|
Glossy |
Smooth, moderate shine, better corrosion resistance |
Buffing compound + polishing wheel on a well-prepped surface |
Automotive parts |
|
Mirror |
Full chrome-like reflection |
Multi-stage buffing with fine-grit compounds |
Showpieces, trim, high-end fixtures |
Do You Need to Sand Stainless Steel Before Buffing?
Not always. Light surface flaws can often be corrected with polishing compounds alone. Deep scratches need sanding first.
To check: find the worst scratch on the piece and buff it with your least aggressive grit (usually 400). If it's still visible, step up to a slightly coarser grit (320) and try again, cleaning the surface between passes. If the scratch survives that too, sand it out before moving on.
How to Buff Stainless Steel: The Weld-to-Mirror Sequence
This is the full progression for taking a rough or welded piece to a mirror finish. Each stage uses a different wheel and compound. Don't skip stages, since each one is removing the scratch pattern the previous stage left behind.

|
Stage |
Tool |
Compound / abrasive |
What it does |
|
1. Flap disc |
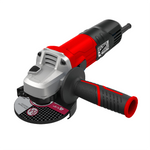
Flap disc on angle grinder |
80–120 grit |
Levels welds, gouges, and heavy surface damage |
|
2. Surface conditioning |
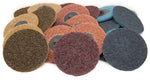
Surface conditioning disc/belt |
Fine/very fine nonwoven |
Blends flap disc marks, evens the surface before buffing |
|
3. Cut buffing |
Sisal buffing wheel |
Cotton Spiral Sewn Buffing Wheel |
Removes fine scratches left by conditioning; heaviest-cut buffing stage |
|
4. Color buffing |
Cotton buffing wheel |
Cotton Cushion Sewn Buffing Wheel |
Refines the surface further, starts building reflectivity |
|
5. Final polish |
Loose buffing wheel |
Flannel Cushion Sewn Buffing Wheel |
Brings up the full mirror shine |
Building this sequence from scratch? Our Stainless Steel Buffing Kit collection bundles the cotton spiral sewn, cotton cushion sewn, and flannel cushion sewn wheels plus tripoli, white, and green rouge compounds shown above.
Clean the piece thoroughly between every stage, as leftover compound from one stage will contaminate the next and leave streaks or haze in the final finish.
Why Buffing Matters (Don't Skip to Polish)
It's tempting to skip straight to polish, especially on smaller pieces. A coat of oil or a quick pass with commercial polish can look decent for a day or two. It won't last. Polish alone just fills in scratches and microscopic crevices rather than removing them. Debris works its way back into those gaps almost immediately, and the surface goes dull again within days.
Buffing actually removes the damaged layer instead of masking it. That's what makes the difference between a shine that lasts a week and a finish that holds up for years. It's the slower step, but it's the one doing the real work; polish is just there to bring out the shine buffing already created.
Machine Setup for Buffing
-
Run your buffer or sander between 4,000–6,500 RPM.
-
Work at a 90° angle to visible scratches, and rotate 90° each time you change grit or wheel.
-
Keep the wheel moving; lingering in one spot risks scorching the surface.
-
Always work with the grain, not against it.
Buffing Tips
-
Go light on compound; overloading the wheel doesn't speed things up, it just makes a mess and risks an orange-peel texture.
-
Use a gentle hand, especially on the color/final buffing stages. Let the wheel and compound do the work.
-
Keep lines tight and overlapping just slightly for an even finish.
-
Move quickly across the surface rather than dwelling in one area.
-
Keep a dedicated wheel and clean cloth for each compound. Cross-contaminating compounds between stages will undo your work.
-
Inspect between every stage before moving to the next one.
Sanding Stainless Steel Before Buffing
If the piece has visible gouges, deep scratches, or weld beads, sand before you buff:
-
Start at 80–120 grit to level heavy damage.
-
Work up through 240 → 400 → 600 → 1200 grit, rotating direction 90° with each grit change.
-
For a true mirror prep, take it as far as 2000 grit before moving into the buffing sequence above.
-
Clean the piece between every grit change. Leftover grit particles from a coarser pass will scratch you right back.
How to Polish Stainless Steel by Hand
For smaller pieces, or touch-ups where you don't want to set up a buffer:
-
Clear away any leftover compound or debris from the buffing stage.
-
Apply a commercial stainless polish to a clean, dry cloth.
-
Work in circular motions, starting at one edge and moving across the surface, similar to hand-waxing a car.
-
Wipe away excess polish with a separate clean, dry towel.
Natural/At-Home Polishing Options
For light maintenance rather than corrective work, a few household options work on stainless steel:
-
Baking soda: a small amount on a damp sponge, worked with the grain. Mild enough for kitchen appliances and food-contact surfaces.
-
Vinegar: dilute 1 part vinegar to 8 parts water (full-strength vinegar can discolor stainless steel). Let sit for 5 minutes, wipe with a damp cloth, then finish with a dab of olive oil on a dry cloth.
-
Dish soap + baby oil: clean with warm soapy water, dry fully, then apply a thin layer of baby oil with a clean cloth for shine.
These won't correct scratches or heavy dulling. For that, you need the buffing sequence above.
How to Re-Polish Stainless Steel That's Already Been Finished
Maintenance polishing on a piece that's already mirror-finished is a lighter job than starting from raw or welded steel. You're rarely starting the sequence over from the flap disc stage.
-
Light haze or fingerprint buildup: hand-polish with a commercial stainless polish (see above), no buffing wheel needed.
-
Faint new scratches on an otherwise good finish: jump straight to the final polish stage (flannel cushion sewn wheel, green rouge or blue compound) rather than working back through cut and color buffing.
-
Deeper new damage: treat it like fresh steel and restart from wherever the scratch depth requires. This usually cuts buffing (cotton spiral sewn wheel + brown tripoli) rather than the flap disc stage, unless there's a gouge or weld involved.
Re-polishing on a schedule (rather than waiting for it to look bad) also means less material removal each time, which extends the life of the piece.
Ready to Bring the Shine Back? Get the Right Tools for the Job
Stainless steel takes a beating: grease, water spots, fingerprints, the occasional scratch from daily use. None of that has to be permanent. Whether you're touching up a kitchen appliance or taking a welded piece all the way to a mirror finish, the right sequence of wheels and compounds gets you there every time.
Benchmark Abrasives carries everything in this guide (compounds, airway and cotton buffing wheels, and sisal wheels for the cut-buffing stage) so you're not piecing the job together from three different suppliers.
Have questions about which compound or wheel fits your project? Reach out to our team; we're happy to help you build the right kit before you buy.
Join Our Newsletter
Sign up to get the latest on sales, new releases and more …Join Our Newsletter
Sign up to get the latest on sales, new releases and more …Shop Categories
Recent Articles
- Buffing Pads for Paint: Foam vs Wool vs Microfiber
- How to Buff Out Scratches on a Car
- Buffing Wheel Speed Chart: RPM & SFPM by Wheel Size
- How to Polish Stainless Steel: A Complete Guide
- How to Load a Buffing Wheel for a Flawless Finish
- Sisal vs Cotton Buffing Wheels: Cutting vs. Coloring
- How To Identify When A Buffing Wheel Needs Replacement
- What is Sisal Fiber and its Applications
- How To Clean A Buffing Wheel: Quick And Easy Steps
- How to Polish Brass to a Mirror Finish
Featured Products
-
 746 Reviews
4-1/2" x 7/8" T29 Zirconia High Density Flap Disc - 10 pack
$25.19
-
 738 Reviews
4-1/2" x .040" x 7/8" t1 premium thin cut-off wheel - 25 pack
$20.88
-
 220 Reviews
4-1/2" x 7/8" T27 Zirconia High Density Flap Disc - 10 pack
$25.19
-
 380 Reviews
6" x .045 x 7/8" T1 Premium Thin Cut-Off Wheel - 25 pack
$27.29
-
 55 Reviews
Nonwoven 6" X 9" Scuff, Clean & Finish Hand Pads
$0.83
-
 123 Reviews
4-1/2" x 1/4" x 7/8" T27 Depressed Center Grinding Wheel - 25 pack
$28.34


Blog Categories
- Abrasives
- Sanding
- Grinding Deburring Finishing
- Safety and Cleanliness
- Metal Working
- Selecting Tools And Equipment
- Wood Working
- Art And Design
- Diy Projects
- Industry 4.0
- Buffing
- Cutting Tools
- Carbide Burrs
- PPE
- Wire Brushes
- Bonded Abrasives
- TIG Electrodes
- Wire Wheels
- Bits
- Diamond Blades
- Power Brushes
- Product Reviews
- Grinding
- Finishing
- Industrial Cleaners