Precision DIY: Crafting Metal Jewelry With Abrasives

A polished, valuable, and alluring piece of jewelry that truly stands out from the crowd is produced by a high-quality finish, but how do you get there?
This guide explains the value of cleaning and readying your jewelry for polishing, the best hand-polishing tools, and how to use a power tool to get a high sheen. Furthermore, we provide you with tips on how to make your article even more brilliant!
As with all jewelry creations, we have discovered over the years that polishing is very much a personal choice, and there is no one right way to do it. It's a reality that many of you detest it, but for the most part, it's necessary, so we thought that by combining our knowledge with yours, we might be able to provide some assistance. Some of you find it calming and fulfilling.
The methods and tools listed here will assist you in understanding them; you can select the ones that work best for you and your project. This will provide you with a solid foundation of knowledge that you can build upon through practice and independent experimentation.
HOW CRITICAL IT IS TO PREPARE
The first rule of polishing is to take your time and properly prepare the surface. It's crucial to get this stage correctly because any deep blemishes, scratches, or fire stains could come to the surface during the polishing process, which would be annoying.
You can save a lot of time at the polishing stage if you take extra time and care with your technique. This entails neatening solder joints and being extra cautious while placing stones; these minor adjustments will help reduce the amount of filing and sanding that must be done, but there will always be some.
CRAFTING METAL JEWELLERY WITH ABRASIVES
STEP 1: FILING
A crucial step in the advancement of jewelry is filing. To finalize and shape your components, as well as to tidy up your design by removing extra solder and metal, use needle files.
Small needle files are ideal for gaining access to tight spaces. To help you select the perfect file for your purposes, they are available in a variety of shapes and are frequently provided in packs containing several different shapes. With practice, you'll quickly learn which file is required for a given task.
STEP 2: SANDING
Making sure you remember to sand your piece is the next step in making sure your jewelry is headed toward a nice finish. The pre-polish holds the key to achieving an exceptionally high sheen. The outcomes will be better if you invest more time and energy at this stage.
Your design has endured a lot after construction, including huge scratches, pickle residue, fire scale, and the dreaded fire stain. You can get rid of them and improve the efficiency and ease of the polishing step by using the following products.
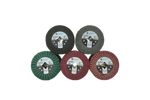
You can polish and finish your jewelry with sandpaper and finishing papers. They can be used for a wide range of results since they come in a range of grits and microns, which are measurements of how coarse or fine they are. Generally speaking, you should begin with the Benchmark Abrasives coarser sandpapers and go to the finer ones before polishing papers are used to finish. A good way to use sandpaper is to sand with the first grit in a single direction. You will sand in the other direction for each subsequent grit until all of the marks from the initial paper are gone.
- DRY AND WET SANDING SHEETS
- POLISHING AND SANDING STICKS
Using our sanding and polishing sticks, which come in a range of grades from 3 (coarsest) to 5/0 (finest) and are already affixed to flat pieces of wood, is an additional option to using wet and dry sanding sheets.
The drawback of these sticks is that because they can be folded and cut into useful forms, wet and dry sanding sheets would be a simpler option for getting into those minuscule nooks and crevices.
Using whichever abrasive grade you choose, begin at the coarse end and work your way around the piece until all surfaces are smooth and sanded. Repeat this process for all the grades, ranging from coarse to fine.
STEP 3: POLISHING
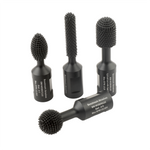
One can attain a high-quality, well-polished finish with a rotatory tool like a Dremel Multi-Tool or by hand. While using a power tool might expedite and simplify tasks, performing tasks by hand can offer greater control, accuracy, and convenience. Frequently, a blend of the two works best!
- POLISHING PAPERS
- THE BENCH-TOP POLISHER
- DREMEL MULTI-TOOL
This is one tool you really must have if you take your jewelry-making seriously! This excellent, small tool may greatly improve your jewelry-making pastime because it is great for high-speed polishing as well as detailed sanding, carving, engraving, cutting, grinding, and cleaning.
STAGE 4: FINAL FINISH
Even though polishing doesn't necessarily result in an extremely high shine, some compounds can give an added glossy finish.
- BURNISHING
The plastic deformation of a surface owing to sliding contact with another surface' is the technical definition of burnishing. This is an old method of smoothing out sharp metal particles to leave a shiny surface by rubbing harsh materials like steel against softer metals like silver and gold.
The burnisher is a wooden tool with a steel blade that is rubbed on metal to polish it. To further smoothen the movement, one might apply wax or oil to the blade. While flat sections of metal can be polished using this method, producing a true mirror finish could be challenging.
A burnisher can be used to smooth bezel settings over gemstones and provide a durable, glossy finish to the top edge, which is quite apparent. It is a very helpful equipment to have in your studio. It can also be used to eliminate setting slip scratches, which can be challenging to get rid of without harming your stone.


