What Are Welding Beads And How Do They Function

The first type of joint beginners learn to create is a bead. A weld bead is a seam deposit that forms during welding in a single step. Dowels are the most frequent form you deal with. However, if they have the proper welding helmet, they can also combine dowels and dowels with various types of beads in them.
Welding Beads and Their Function
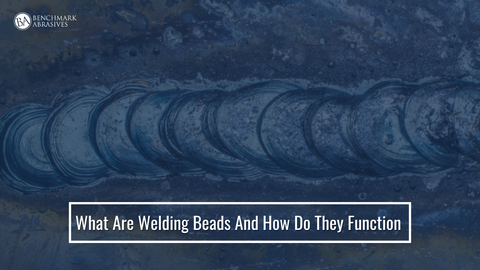
The term "bead" refers to a single pass made along a joint by the welding torch or electrode. It also refers to the beaded or raised appearance of the workpiece due to the welded metal deposit. The welding torch or electrode makes several passes along the seam to form a bead. A small amount of filler metal is added each time.
The type of filler metal used, the welding technique employed, and the welder's expertise can all affect the size and shape of the beads. A well-formed bead will typically be uniformly distributed and have a fixed width and height.
The joint between two pieces of metal is filled with filler material to form a weld bead. How you move the torch will affect how the puddle advances and the kind of beads you leave in the joint. This is when you melt filler material into the workpiece.
The standard stringer bead wheels are wire wheels, suggested for root pass weld cleaning, surface preparation, and other cleaning processes.
The Function of Welding Beads
- Structural fitness: The key function of welding beads is to make sure that the joint is stable in terms of structure. To create a solid bond, ensure that the bond penetrates successfully into the base materials. The reliability and durability of the welded structure totally depend on how strong the bead is.
- Acts as a sealant: the welding beads act as a sealant or create a barrier for any gases or fluids to pass through the joint. A solid bead stops gasses or liquids from moving through the joint.
- Corrosion resistance: welding beads can also act as a shield against corrosion. The corrosion resistance ability of the beads is completely dependent upon the techniques of welding and the selection of filler metal.
- Transfer loads: welding beads help in distributing loads and forces throughout the joints by serving as a bridge between two workpieces. It is effectively designed to distribute the load and can help prevent stress concentrations that can ultimately cause failure.
Why Use Various Torch Motions?
There are various techniques to run a weld bead along a metal connection, like sewing a seam in clothing. But unlike tailors, welders often work in an uncomfortable position while donning gloves and a face shield.
Gravity also influences how molten metal is deposited between metal plates or pipe segments. For instance, welding overhead requires quick movement. If you don't, the molten metal will not fill the joint but leak onto your face shield.
So, a welder must use a particular hand stroke and move the puddle properly to bring the beads down after preparing a joint for welding, choosing the necessary filler material (such as a stick, rod, wire, etc.), and selecting the correct machine settings.
Different Weld Bead Styles and Torch Movements
Generally speaking, torch manipulation is very similar whether the weld pool is fed mechanically, manually, or with a stick electrode. However, specific methods are employed in a single process. The four most popular ways for manipulating a torch when making welding beads are as follows:
Principal methods for welding beads:
- Stringer beads
- Weave beads
Process-specific methods:
- Whip motion (stick)
- Walking the cup (TIG)
1. Stringer Beads
To form a stringer bead. you press or drag the torch along the joint in a parallel line with minimal side-to-side movement. Dragging is the angle at which the electrode points "forward" during the weld, guiding the puddle. This allows for the most penetration and solid welds.
Welders "push" the flame point when working with fragile and sensitive to-heat metals or when welding vertically. This might be accomplished by welding while angled away from the puddle with your welding torch.
Melted metal slips downward when joining vertically. However, by preventing the heat from reaching the puddle, pressing the weld accelerates its solidification.
A few drawbacks of pushing include the fact that it penetrates the base metal less thoroughly than drawing (or "dragging") the molten pool. Despite their typically narrow width, stringer beads can be used in any welding position.
It is crucial to "tie in" the weld toe on both sides of the joint, even if you are going straight ahead. Remember that welding is more than just putting new metal into a junction.
Fusion is crucial between the base metal and the weld.
Sometimes the welding puddle might run over both sides of the joint if the torch is handled slowly enough. This could be all that is needed for a successful fusion. Occasionally, a small side-to-side correction is necessary.
Minimize side-to-side motion. An excessive amount of side-to-side swinging will produce a weaving bead. String beads are also used in hard facing. This surfacing process extends the life of the fenders, plows, scoops, and other external metal components of industrial equipment. The beads then build a protective layer rather than combining with the base metal.
2. Weave Beads
To ensure thorough welding, start weaving side by side along with the joint. The quickest way for a fat joint to weld is weaving
This is especially true for groove welds on thick stock. Fillet welds often contain weaves.
Every welder has their preferred type of weave, albeit there are others. Your hand might move in a zigzag, crescent, or curly shape. Your weld puddle's heat is controlled by weaving, which also fills the beads. To establish a proper tie-in to the metal parts and avoid undercutting the edges, you can pause on each side of the weld.
You'll want to move quickly over the joint's center, though. You risk a high crown (a bulge in the middle) if you don't. Therefore, it is preferable to have a flat or hardly convex weld face during weaving.
Filling a steep pocket is made easier with a triangle weave. By using this weaving technique, for example, you can prevent molten metal from going downhill during vertical-up welding by creating a ledge beneath the puddle.
You can try a semi-circle weave with the center point or your stroke across the front of the puddle (or just ahead of it) to prevent overheating or growing. As in the last illustration, weave the semi-circle (or crescent) back through the puddle to increase heat.
Weaving overhead can be difficult because the molten metal is drawn out of the weld by gravity. It may be challenging to lay down an overhead weave bead that is half an inch broad or wider, even with practice. However, since weaving is faster than running multiple string beads, welders learn the technique.
3. Whip Motion (Stick)
Stick welders typically whip their wrists in a circular motion on open channel welds during the root pass, the initial weld operation. The goal is to employ a flat bead of welding metal to join the work plates at the bottom. For root runs on low-carbon steel, the E6010 and e6011 "fast-freeze" rods are the most often used stick electrodes.
The welder moves the electrode along after raising it through the gap. To achieve through penetration, this is crucial. This will cause a keyhole to form in the head opening of the puddle.
This is one of the hardest strokes to learn as a welder. While looking at the puddle, you must maintain a fixed keyhole size. You cannot fuse the two sides if it becomes too large (i.e., double the rod diameter). Heat management is, therefore, essential during a root pass. You may regulate the size of the keyhole using the frequency of your whip strokes. In addition, you may use suitable joint designs and welder settings.
You'll whip the rod upward and ahead of the weld before the keyhole size swells too much. This process cools everything while maintaining a consistent keyhole size. It also enables the puddle's back bead to solidify. Once the beads solidify, you go back to the molten pool. If you're stuck welding, another drop of weld metal should drop off your rod, producing your next shot. Everything happens quickly. Therefore, you must pay close attention; the amount of heat you see in the weld will influence the whipping rate.
Due to insufficient heat, you could not whip when you started welding. By the time you get to the weld finish, you can flick your wrist steadily because of the tremendous heat passing through the base metal.
- J-Weave – Whip Variation
The whip action is also known as the "J-weave." This crescent-whip stroke combination is commonly employed in a V-groove joint second (or "hot") pass.
In this posture, move your fast-freeze electrodes (such as the E6010) from toe to toe, stopping momentarily on each side and whipping the rod up and forward along the side of the joint.
A longer arc is beneficial to the work. In order to repeat the stroke, you will first whip ahead like you would with a root pass, then return to the adjacent free area on the left (or right) side of the weld.
4. Walking The Cup (For TIG)
To perform a root pass on the pipe, welders utilize a TIG torch. Compared to stick or MIG welding, it produces a bead that is cleaner and more accurate.
It requires a hand gesture known as "walking the cup." Here, the cup is the ceramic insulator that surrounds the tungsten tip. The cup is rocked back and forth along the weld joint by the welder.
The knotted wire cup brushes are used for deburring and removing welding scales. Additionally, they are used to remove slag, scale, and carbon.
CONCLUSION
As you can see, particularly with wider joints, filling a junction with material largely depends on how you move your torch. Your welding quality can be improved by studying these strategies and approaches. You must set up your welder correctly, choose the necessary filler material, adequately prepare your joint, and apply the appropriate torch movement technique for the kind of beads you want to make.
The four techniques discussed above are an excellent place to begin. But remember that flame manipulation techniques have variants and subtleties. Lots of practice is the key to adding all these skills to your welding toolbox.


