Beginner's Guide to Buffing and Polishing Stainless Steel

We can’t imagine a world without stainless steel. Nowadays, it’s hard to find a material better than stainless steel when it’s polished to mirror shine. That shiny, high-gloss look is all you need to go for, whether it’s for home and kitchen appliances or the automotive industry. Generally, “Looks” are everything that people buy. They happily pay for shimmering and maintenance-free material.
What is Stainless steel?
Stainless steel or rustless steel is an iron-based alloy known for its properties like heat resistance and corrosion based on the composition of a minimum of approximately 11% chromium.
Prevention of iron from rust and stain, low maintenance, and familiar sheen make stainless steel an ideal choice of material depending on the industry. From kitchen accessories to cookware to residential to commercial purposes, stainless steel is an appealing option because of its durability and strength.
Steps to buff and polish stainless steel are:
- Clean and dry the steel and repair
- Give the stainless steel a good buff
- Polished to a mirror finish
Step 1: Repair Any Damaged Areas And Clean and Dry The Stainless Steel
The first basic step before starting the process is cleaning the surface. There should be no remains as it can worsen the scratches or even add new ones.
Now the question arises, how to clean stainless steel and what to use while cleaning?
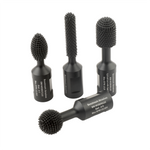
The answer is you can use any mild detergent and clean it with a soft clean sponge or cloth and pat it dry completely. Then, fix any damaged and rough areas, if any using a grinder, and make it smooth.
Step 2: Buffing Stainless Steel
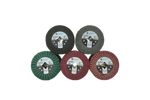
After repairing and cleaning the surface, polishing comes next. Buffing is the process of removing any lines or abrasions from stainless steel to make it shine. Applying a buffing compound to the wheel can be done with any power tool you have or an angle grinder with sandpaper on the disc. You can also use sandpaper manually for leveling the workpiece.
Buffing is necessary if you want a smooth and glossy look without having any scratches. But as we said earlier, looks are everything people buy. Buffing gives you that. For instance, you have a damaged surface, and you only polish it. You get that shiny look but with scratches; imagine that!
How to Buff Stainless Steel?
Start by attaching 220 grit sandpaper to the wheel pad with some rubbing compound (not too much) and sanding the stainless steel uniformly. Be careful not to overdo any area. Once it’s done, again do the same process using 400 grit then with 800 grit, and with 1500 grit until it starts looking like a mirror. Then again, attach the buffing wheel with 3000 grit (the last second step of buffing) and lastly with 5000 grit. You see each stage of sanding, the steel looks finer and shinier, removing all the patches, dull paint, and damage, and practically, you can see your reflection in your masterpiece.
- Be careful with the compound you take each time for sanding, don’t take too much, just a little will do the work.
- Use a light hand when sanding; don't overdo any areas.
- Avoid overlapping.
- Check the progress after each stage of compounding and sanding before going any further.
- You can go up to 6000 grit according to the material size and the gloss you want.
Be careful while buffing; it’s the base of your pillar.
Step 3: Polishing Stainless Steel
The last and final step is polishing once you are done scraping the patches off of your stainless steel. First, know that metal polishing is a process of smoothing out the surface by rubbing it with your hands or with power tools to get that glossy effect.
Start by cleaning any excess compound left in your workpiece. Apply polishing liquid and start polishing the surface using the power cutting tools. Do it 5 to 10 times till you get that luster finish you want. Clean the surface again if there are any remains of polishing liquid. Here is your perfectly smooth, shinier, glossy stainless steel. Apply the polishing compound and start rubbing it with a clean cloth using light pressure till you get a finer look.
Additional Tips To Consider
- Test in an Inconspicuous Area: it's crucial to examine your method on a small and discrete area. This helps evaluate the selected buffing speed, pressure, and polishing compound.
- Do not overheat: ensure that you do not overheat the stainless steel. Overheating can cause discoloration, deformation, and even structural damage to the workpiece. Always make sure to apply light pressure and constant speed to prevent it.
- Regularly clean your tools: always clean your tools regularly after each use to maintain a consistent and high-quality finish. The contaminants built up in the tool have the potential to damage your stainless steel and lead to uneven polishing.
Also Read:


