How to Replace a Bench Grinder Wheel

You may learn how to quickly and effectively swap out bench grinder wheels by reading this post! Bench grinders are excellent cutting tools and are useful for various tasks. You'll note that the wheel degrades over time, which indicates that it needs to be replaced.
How To Replace a Wheel On a Bench Grinder (8 easy steps)
Follow the easy steps below to repair or replace your bench grinder's old wheel with a new one and to test it.
Step 1: Unplug The Bench Grinder
To prevent accidents, unplug the bench grinder before performing any repairs or alterations.
Step 2: Take The Wheel Guard Off
The wheel guard serves to protect you from any debris that could fall off the grinding wheel as well as the working parts of the grinder. To remove these, use a wrench to unscrew the two side bolts.
Step 3: Remove The Locknut From The Wheel Shaft
To remove the locknut from the grinding wheel shaft, use a wrench to turn the locknut so you can easily remove it.
Step 4: Remove The Old Grinding Wheel
After removing both bolts, the old grinding wheel can be removed by gently pulling it out. Remember, If the grinding wheel shaft becomes jammed, be careful not to apply too much pressure, as this can damage the shaft.
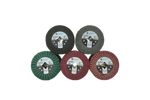
Step 5: Mount A New Grinding Wheel
Before pressing it in until you hear it lock onto the nut, make sure a new grinding wheel is properly aligned in the groove on the top of the grinder's body. Then, to avoid damage if too much pressure is applied to one side, tighten one nut clockwise with your wrench while holding the other side of the grinder's frame.
Once all of the steps mentioned above have been completed, tighten the second nut in the same manner as the first, either using the opposite hand or the same one once more. Then, proceed to the next step.
Step 6: Put The Wheel Guard On
To protect you and your surroundings, simply screw the wheel guard back in place and use a tool to secure the two nuts on either side after replacing the grinding wheels.
Step 7: Test The New Wheels
Before starting work, test the newly replaced grinding wheels to make sure they are working correctly.
Step 8: Remove Any Debris
Tools used in this procedure should be removed before any debris formed during essential repairs or adjustments is cleaned up to prevent depositing dirt and dust in the wrong places and causing injury. Finally, stand back and appreciate your accomplishments! Your bench grinder's grinding wheel has been successfully replaced.
Before using the new wheels for actual projects, test them by grinding metal or concrete to ensure they are functioning properly. Also, always exercise caution when using any power tools.
Additional safety measures
-
Ensure that the bench grinder is securely clamped to the bench before working with it. This helps in preventing severe injury.
-
Ensure to wear proper protective gear like glasses and hand gloves when working with bench grinders.
-
Allow the grinding wheel to cool down a bit before removing it from a shaft.
-
Be careful while removing or installing a grinding wheel. Make sure that it will not drop to prevent accidents.
-
Always get help from professionals if you don't know how to change the bench grinding wheel or if you are a beginner.
CONCLUSION
You won't need to hire a pro to complete this straightforward project now that you know how to change a bench grinder wheel. Without worrying about sending your machine into the shop for repairs, you can quickly and effectively remove an old grinding wheel and replace it with a new one by following the above simple steps.


