


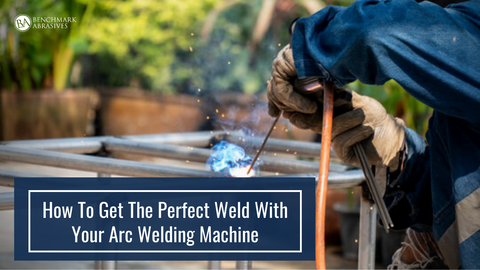
How To Get The Perfect Weld With Your Arc Welding Machine
For an electric arc between the consumable electrode and the base metal, shielded metal arc welding uses a consumable electrode and either an alternating current power supply equipment or a direct current power supply machine; this welding method is entirely manual.
Stick welding and manual metal arc welding are two other names for shielded metal arc welding. Due to its many benefits, this type of welding is frequently utilized in various industries. Stick welding uses essential, portable equipment that is now readily available online. It is compatible with multiple welding electrodes and can be used in tight spaces with minimal financial outlay.
This step-by-step guide will help you perform the essential procedures to get the most out of your arc welding machine, ensuring strong, clean, and durable welds.
Get The Perfect Weld With Arc Welding: Step-By-Step
Achieving a high-quality, strong weld requires careful attention to technique and process. Taking a structured approach can greatly improve the final results.
Using your shielded metal arc welding machine and other welding supplies, follow the step-by-step instructions below to get the perfect weld:
1. Pre-Welding Techniques
Clean the metals that will be bonded to remove any excess grease, dust, or rust, and file a slanting edge out of each metal side. The latter method creates a stronger weld connection by allowing more penetrating space.
2. Using The Necessary Safety Equipment
Any procedure involving electricity and sparks necessitates the rigorous observance of safety regulations. Safety shoes, gloves, welding robes, and safety glasses make up the bulk of the equipment needed for welding. Safety shoes shield your feet from welding sparks, safety gloves shield your hands from burns, and safety glasses shield your eyes from the intense glare that the metal emits while welding.
Welding robes are fire-resistant materials to prevent potential fires or holes from being burned into your clothing. Welding blankets are frequently used to put out small fires and stop them from spreading into major ones.
3. Establishing Your Workspace
Making a safe workspace is equally vital. The table or platform that you'll use to store your workpiece and welding supplies ought to be made of fire-resistant material. Sparks from welding frequently land on the ground, so removing any flammable materials like grease and oil from the workshop floor is crucial.
4. Protecting Your Workpiece
Hold the metal pieces together with a clamp until they have been welded. Clamps could be used to hold your metal components in place.
5. Striking The Arc
An arc is created by briefly contacting the workpiece with the electrode and then lifting it back. The electrical circuit is completed when the electrode comes into contact with the metal workpieces, creating heat that melts the metal and starts to produce the welding connection.
6. Proper Rod Movement and Position
Maintaining the rods tilted at an angle of ten to twenty degrees from vertical while welding is standard practice. The rod should move so that it follows a straight path. It would help if you kept the arc length and the separation between the electrode and the weld pool within acceptable limits. The ideal arc length should have two qualities: it should block most of the light from the weld while preventing the rod from being pushed into the slag pool.
7. Developing The Bead
A bead formation is said to have occurred when the molten consumable electrode and molten base metal have filled the area between the metal pieces that are being connected. It would help if you practised your arc movement to achieve the desired form for your bead.
8. You Should Clean And Paint Your Weld
You can use an angle grinder to remove any slag from your weld to examine it more closely for any welding-related flaws and defects. If you paint, your newly welded workpiece will have a longer, corrosion-free life.
Welding Defects: Causes and Easy Prevention Tips
Welding defects result in weak weld joints. To avoid the defects and keep them safe and strong, these common problems and their causes will help you.
- Porosity: This occurs when small air bubbles are trapped in the weld, forming holes. To prevent this, make sure the metal is clean and dry, and that you protect the weld with enough shielding gas.
- Slag Formation: This occurs when slag (a leftover flux) gets trapped inside the weld. To prevent it, clean the area well and remove slag after each pass.
- Undercut: Undercuts are small grooves along the edge of the weld. Keep a steady hand, maintain the right arc length, and move at the correct speed to avoid this.
- Cold Laps: Cold laps happen when the metal cools too quickly and doesn’t fuse properly. Use the proper intensity of heat and don’t rush the welding process to prevent this.
- Cracks: Cracks form when the metal cools too fast or is under too much stress. Preheat the thick metal and take your time cooling down to avoid cracking.
Conclusion
Making flawless welds requires a lot of hard work, dedication, and attention to detail. By following the right methods, using the right equipment, and avoiding common mistakes, you can ensure that your welds are strong, clean, and long-lasting. To ensure the success of your welding projects, always prioritize safety and perform regular maintenance on your equipment. With these tips and techniques, you'll build your confidence and improve your welding skills.
Join Our Newsletter
Sign up to get the latest on sales, new releases and more …Join Our Newsletter
Sign up to get the latest on sales, new releases and more …Shop Categories
Recent Articles
Featured Products
-
 746 Reviews
4-1/2" x 7/8" T29 Zirconia High Density Flap Disc - 10 pack
$25.19
-
 738 Reviews
4-1/2" x .040 x 7/8" T1 Premium Thin Cut-off Wheel - 25 pack
$20.88
-
 220 Reviews
4-1/2" x 7/8" T27 Zirconia High Density Flap Disc - 10 pack
$25.19
-
 380 Reviews
6" x .045 x 7/8" T1 Premium Thin Cut-Off Wheel - 25 pack
$27.29
-
 123 Reviews
4-1/2" x 1/4" x 7/8" T27 Depressed Center Grinding Wheel - 25 pack
$28.34
-
 55 Reviews
Nonwoven 6" x 9" Scuff, Clean & Finish Hand Pads
$0.83


Blog Categories
- Abrasives
- Sanding
- Grinding Deburring Finishing
- Safety and Cleanliness
- Metal Working
- Selecting Tools And Equipment
- Wood Working
- Art And Design
- Diy Projects
- Industry 4.0
- Buffing
- Cutting Tools
- Carbide Burrs
- PPE
- Wire Brushes
- Bonded Abrasives
- TIG Electrodes
- Wire Wheels
- Bits
- Diamond Blades
- Power Brushes
- Product Reviews
- Grinding
- Finishing
- Industrial Cleaners