




























How to Choose and Use Polishing Compound on Metal

Polishing compound is a fine abrasive blended into a wax bar. You touch the bar to a spinning buffing wheel, and the wheel carries the abrasive across the metal to smooth scratches and bring up shine. The right bar depends on your metal and how rough the surface is. The right technique comes down to wheel speed, a light touch, and a clean wheel at every stage.
Pick the wrong bar and you get haze on stainless steel, heat marks on aluminum, or fresh scratches on brass. Whether you are restoring a brass handle, a stainless tool, or an aluminum trim piece, the sequence below applies. It is written for DIYers and shop users working on removable parts with a bench buffer or a drill-mounted wheel.
What Polishing Compound Is Used For and How It Works
What is polishing compound used for?
Polishing compound removes fine scratches, light oxidation, and haze, then brightens the surface to a smooth, reflective finish. It refines a surface. It does not repair one. Deep gouges and heavy rust need grinding or coarser sanding first, because compound only softens the scratch pattern that is already there.
Compound is one step in a larger finishing process. Our guide to buffing vs. polishing vs. waxing explains where each step fits.
How does polishing compound work?
Each bar holds tiny abrasive particles in a wax binder. When you press the bar against a spinning wheel, friction softens the wax and spreads the abrasive over the wheel face. As the wheel passes over the metal, those particles shave off microscopic high points. Cutting stages remove more material. Finishing stages remove almost none, and the surface turns smooth enough to reflect light.
Types of Polishing Compound: Cut, Polish, and Finish
Polishing compounds sort into four stages, and most projects use more than one. Our own rated bars show how the stages trade cut for gloss:
- Cutting compounds: Remove deep scratches, oxidation, rust, and weld scale. Black Super Heavy rates 10/10 for cut and 1/10 for gloss, and Brown Heavy Cutting rates 9/10 and 3/10.
- Cut and color compounds: Correct the surface and start building brightness in one pass. Pink Cut & Color rates 8/10 for cut and 5/10 for gloss.
- Polishing compounds: Refine fine marks and add gloss. Blue Natural Luster rates 3/10 for cut and 9/10 for gloss.
- Finishing compounds: Bring up the final shine and remove almost nothing. Emerald Green Super Finish rates 1/10 for cut and 9/10 for gloss.
Color tells you the job, but it is not a universal standard. Every maker blends abrasive and binder differently, so read the stage and cut rating on the label. Our buffing compound color chart lists each color by metal, cut level, and wheel.
Solid bars run on powered buffing wheels. Liquids and pastes suit hand pads and light touch-ups. Pick one format per job and do not mix them.
How to Choose Metal Polishing Compound for Your Project
Start with two questions: what is the metal, and how rough is the surface? The metal decides which bars are a good match, and the surface decides where you enter the sequence. These sequences follow the tips on our product pages:
- Stainless steel and nickel or chrome plating: Black, then Pink, then Green.
- Other hard metals: Black, then Pink, then Blue, then Green.
- Brass, copper, and soft metals: Brown, then Blue, then Green.
- Aluminum: Brown, then Blue. White Rouge is a mild-cut finishing option.
- Gold, silver, and platinum: Blue, then Red.
Enter the sequence only as far back as the surface needs. If the metal is dull but has no real scratches, skip the cutting bar and start with a polishing or finishing compound. Plating is thin, so an aggressive cut can wear through it. Test a hidden spot first on anything you cannot replace.
Set Up the Wheels and Your Safety Gear
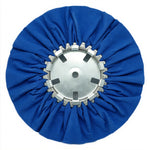
The compound supplies the abrasive, but the wheel decides how it meets the metal. Our product pages pair each stage with a wheel style:
- Spiral-sewn or sisal wheels: Firm wheels for the cutting stage with Black, Brown, and Gray bars.
- Cushion-sewn wheels: For the polishing stage with Pink, Blue, and White Rouge.
- Flannel wheels: Soft wheels for final coloring with Emerald Green and Red.
Give each compound its own wheel and label it. Coarse residue left in a finishing wheel puts fresh scratches into a mirror finish. Choose matching buffing wheels for every stage before you start.
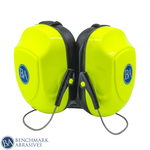
Check that the wheel's printed maximum RPM is higher than your machine's speed, and inspect the wheel for damage before you mount it. Wear safety glasses, hearing protection, a respirator, and hand protection. Keep every guard in place, and stand out of the wheel's line of rotation when you start the motor.
How to Use Polishing Compound, Step by Step
Run through the same short loop at every stage, and change the wheel and compound each time you move to a finer grade:
- Prep the metal. Degrease it, dry it, and check it under a low-angle light.
- Set the wheel speed. Know your surface speed and stay under the wheel's rating.
- Load the bar. Touch it lightly to the spinning wheel for a second or two.
- Polish with light pressure. Use steady, overlapping passes below the wheel's centerline.
- Clean between grades. Stop the motor, wipe the part, and switch to a dedicated wheel.
- Finish and clean off residue. Use a flannel wheel, then inspect the bare metal.
Prep the metal
Wash off dirt and oil with solvent, then dry the part completely. Trapped grit loads the wheel and drags scratches across the surface. Shine a light across the metal at a low angle to see what you are actually correcting. If scratches are deep, sand through finer grits first and remove each earlier scratch pattern fully before you move on. Hand polish thin, plated, or coated pieces rather than risking cut-through or heat warping.
Set the wheel speed
Surface speed, not motor RPM alone, drives cut rate and heat. Surface feet per minute equals 3.14 times the wheel diameter in inches times the RPM, divided by 12. An 8-inch wheel on a 3,450 RPM motor runs at about 7,200 SFPM.
Never exceed the RPM printed on the wheel. As a rule, pair faster surface speeds and firm wheels with heavy cutting, then drop to slower speeds and soft wheels for final coloring. Thin parts and aluminum heat quickly, so keep those on the slower side.
Load the bar
With the motor at full speed, touch the bar lightly to the face of the spinning wheel for a second or two. You want a thin, even film. Do not force the bar or pack the fibers. Reload only when the cut visibly slows.
Too much compound glazes the wheel, cuts less, and smears black residue across the metal. If that happens, stop and clean the wheel with a buffing rake instead of adding more bar.
Use light pressure and steady motion
Bring the part to the wheel slightly below the centerline, with edges pointing down. Guide it in smooth, overlapping passes with just enough pressure to hold contact, and let the abrasive do the cutting. Lingering or pressing hard builds heat, cuts waves into the metal, and rounds crisp edges. The cutting stage can take a bit more pressure. Each finer stage needs less.
Wipe a test area clean and check it under bright light. A good cutting stage leaves one uniform, level surface, not a single shiny patch. Do not move to a finer compound until the last scratch pattern is gone.
Clean between grades
Shut off the machine before you change wheels. Wipe the part with solvent and a clean microfiber towel to lift leftover compound, so coarse particles do not travel into the next stage. Mount the dedicated wheel for the next bar, and never carry cutting compound into a finishing pass.
If you must reuse a wheel, rake it first. A rake strips packed wax but cannot remove every coarse particle, so a dedicated wheel stays the safer choice. Store bars covered and labeled so coarse and fine grades never touch.
Finish and clean off residue
Use a clean flannel wheel with a finishing compound and very light pressure. If the gloss stops improving, do not press harder. Check for a contaminated wheel, too much compound, heat, or scratches left from an earlier stage.
Lift the wax residue with mineral spirits, then wash with warm soapy water. Judge the finish only after cleaning, under bright, angled light. Once it looks right, apply a protectant suited to the metal.
Fixing Common Polishing Problems
- Black streaks or smearing: The wheel is overloaded. Rake it and use less compound.
- Cloudy finish: Look for heat smear, leftover residue, or scratches that survived an earlier stage. Clean the part, then return only to the stage that fixes the cause.
- Fresh scratches: Suspect a contaminated wheel or grit carried over from a coarser stage. Switch to a dedicated wheel and wipe the part again.
- Burn marks or discoloration: Pressure was too heavy or the part stayed in one spot. Lighten up, keep moving, and let aluminum and thin parts cool.
Frequently Asked Questions
Can I polish metal by hand?
Yes, for light touch-ups. Liquid or paste compound works with a soft cloth or pad, while solid bars need a powered wheel. For valuable antiques, thin plating, or heavy corrosion, test a hidden spot first or ask a restoration specialist.
Can I use different compounds on the same wheel?
No. Use one compound per wheel. Coarse residue can carry into a finishing stage and leave scratches, haze, or an uneven shine. Label each wheel by compound so the stages stay separate.
Which polishing compound works on stainless steel?
Our stainless steel sequence runs Black, then Pink, then Green. Gray Stainless is a single-bar option for general polishing, since it cuts and brightens in one step.
Is buffing compound the same as polishing compound?
Both names describe the same kind of solid bar in our range. Black Emery is sold as a buffing compound and Black Super Heavy as a polishing compound. Judge a bar by its stated stage, cut rating, and target metal, not its name.
Pick Your Polishing Compound and Start Polishing
Polishing compound works best as a sequence: cut the defects, refine the surface, then bring up the shine, with a clean wheel at every step. Match the bar to your metal, keep the pressure light, and move to a finer grade only when the last scratch pattern is gone.
Shop buffing compounds for every stage.
Join Our Newsletter
Sign up to get the latest on sales, new releases and more …Join Our Newsletter
Sign up to get the latest on sales, new releases and more …Shop Categories
Recent Articles
- Eric Marshall (Northern Springers)
- Fabtech Spotlights - Metal Artist Collective
- Felt Polishing Discs, Flap Discs & Flap Wheels
- How to Polish a Weld to a Mirror Finish
- How to Polish Cast Aluminum
- Luke Hummer - Erie County Community College
- Industrial Quick Change Discs for Fast-Lock Grinding and Finishing
- Felt Polishing Wheels, Bobs & Discs: Guide to Detail Work
- Matthew Cartwright
- Jacob Martinez (Foxholes to Fabworks)
Featured Products
-
 746 Reviews
4-1/2" x 7/8" T29 Zirconia High Density Flap Disc - 10 pack
$25.19
-
 738 Reviews
4-1/2" x .040" x 7/8" t1 premium thin cut-off wheel - 25 pack
$20.88
-
 220 Reviews
4-1/2" x 7/8" T27 Zirconia High Density Flap Disc - 10 pack
$25.19
-
 380 Reviews
6" x .045 x 7/8" T1 Premium Thin Cut-Off Wheel - 25 pack
$27.29
-
 55 Reviews
Nonwoven 6" X 9" Scuff, Clean & Finish Hand Pads
$0.83
-
 123 Reviews
4-1/2" x 1/4" x 7/8" T27 Depressed Center Grinding Wheel - 25 pack
$28.34


Blog Categories
- Abrasives
- Sanding
- Grinding Deburring Finishing
- Safety and Cleanliness
- Metal Working
- Selecting Tools And Equipment
- Wood Working
- Art And Design
- Diy Projects
- Industry 4.0
- Buffing
- Cutting Tools
- Carbide Burrs
- PPE
- Wire Brushes
- Bonded Abrasives
- TIG Electrodes
- Wire Wheels
- Bits
- Diamond Blades
- Power Brushes
- Product Reviews
- Grinding
- Finishing
- Industrial Cleaners