



























How to Polish Cast Aluminum

Learn how to polish cast aluminum by stripping factory coatings, leveling surface texture with a controlled grit ladder, and machine buffing through cut and color stages. Cast alloys contain natural porosity, so avoiding overly aggressive grinding is essential to prevent exposing subsurface pinholes. While cast parts retain a softer luster than billet, proper technique creates a brilliant, reflective finish.
This guide is built for DIY restorers and fabricators detailing cast wheels, intake manifolds, and valve covers. A thorough restoration can take many hours, especially on complex castings with heavy texture or pitting. For non-cast sheet or billet metals, refer to our general mirror polishing guide instead.
Before starting, gather heavy degreaser, chemical stripper, 80 to 400 grit dry abrasives, 600 to 2000 wet/dry sandpaper, PPE, and dedicated buffing kits with cutting and coloring compounds.
Follow the steps below to restore your cast aluminum components to a mirror-like shine.
Identify Your Aluminum Type and Set a Realistic Finish Goal
Identify your metal before prepping. Cast parts display rough, pebbly textures, visible parting lines, and surface pores. Billet and wrought stock feature uniform grain or flat machined faces.
Cast alloys contain silicon and micro-porosity that scatter light, causing a soft, milky haze rather than crisp reflection.
-
Aluminum Type: Cast; Typical Surface Condition: Pebbly, porous, visible seams; Starting Grit: 80-180 grit; Realistic Finish: Bright luster; Biggest Risk: Exposing pores
-
Aluminum Type: Billet; Typical Surface Condition: Machined, flat faces; Starting Grit: 180-320 grit; Realistic Finish: True mirror; Biggest Risk: Deep gouges
-
Aluminum Type: Forged; Typical Surface Condition: Dense, fine grain structure; Starting Grit: 120-240 grit; Realistic Finish: Deep mirror; Biggest Risk: Surface smearing
-
Aluminum Type: Diamond-Plate; Typical Surface Condition: Mill finish with raised lugs; Starting Grit: 120-180 grit; Realistic Finish: Bright commercial; Biggest Risk: Lug distortion
Your target finish dictates your prep workflow:
-
Driver-Clean Bright: Sand up to 600-1000 grit before machine buffing.
-
Show-Polished Mirror: Sand progressively through 1500-2000 grit for maximum clarity.
Once your target is set, safely strip existing coatings to test the bare metal.
Strip Factory Coatings and Run a Porosity Test Spot
Buffing directly over clearcoat or anodizing is a common mistake that wastes hours. Friction heats and smears coatings into an unworkable haze rather than leveling bare metal. Identify coated surfaces by checking for flaking edges, yellowing, uniform factory gloss, or tight water beading.
Put on chemical-resistant gloves, eye protection, and a respirator in a well-ventilated area before stripping.
-
Degrease: Scrub the casting with a heavy degreaser to remove oils that trap abrasive grit.
-
Strip the finish: Apply a chemical stripper following manufacturer directions until the clearcoat lifts.
-
Rinse and dry: Neutralize the metal with clean water and dry it completely.
Before working the entire part, run a 2-inch sand-and-buff test patch in an inconspicuous area. Watch for "pepper spots," pinholes, or compound loading into micro-voids. Remove only the minimum material needed to level the casting. Aggressive grinding exposes deeper subsurface porosity that you cannot polish out.
Perform a Depth Decision Test on Pits and Corrosion
Before sanding, distinguish between surface oxidation stains, uniform casting texture, and true corrosion pits. Chasing deep pits wastes abrasive material and thins structural metal.
Use this test to evaluate pitting depth:
-
Clean and mark: Confirm the surface is clean and dry, then circle the worst pitted spot.
-
Spot test: Sand the spot for 1 to 2 minutes using 220 to 320 grit paper, or 120 grit if the casting is very rough.
-
Inspect edges: Wipe the area clean. If crater rims feather flat, the pits are shallow enough for full removal. If sharp edges remain, you are only polishing around holes.
Caution: On load-bearing parts like wheels, never aggressively chase deep pits.
Choose your path based on the test: fully level shallow blemishes, blend and accept minor pits, or seek professional inspection if structural thickness is compromised. This baseline dictates your leveling approach and grit sequence.
Level the Casting Texture Using a Coarse-to-Medium Grit Ladder
Leveling removes rough casting texture, parting lines, and surface damage until the aluminum carries a uniform scratch pattern. Hand sanding provides the best control, though a DA sander on broad flats or a die grinder in tight zones speeds up material removal. Keep tools moving constantly. Dwelling creates dished low spots that cast aluminum telegraphs straight through the final polish.
Follow this baseline grit ladder, adjusting your starting point based on initial testing:
-
80 to 120 Grit: Flatten casting peaks and seam lines. Use a rigid backing block on flats to prevent waviness, and switch to conformable abrasives on curves.
-
220 Grit: Remove coarse scratches. Sand at a 45-degree angle to the previous pass to verify earlier marks are erased.
-
400 Grit: Refine the scratch profile without lingering to avoid hogging soft metal.
Checkpoint: Wipe the surface clean. You should see no casting peaks or deep scratches, leaving a uniform, leveled profile.
Wet Sand with Fine Grits to Prepare for Buffing
Fine wet sanding saves substantial buffing time when learning how to polish cast aluminum. Match your final grit to your target finish:
-
Bright driver finish: Stop at 600 to 1000 grit before moving to buffing wheels.
-
Show polish: Continue through 1500 to 2000 grit to minimize haze and compound cutting time.
Use wet/dry silicon carbide sandpaper lubricated with water and a drop of dish soap. The soapy water reduces paper loading and produces a refined scratch pattern.
Maintain scratch discipline by completely removing the previous grit's scratches before stepping up. Lighten your sanding pressure over sharp casting edges and raised logos to prevent rounding.
Checkpoint: The aluminum should display a uniform satin finish with fine lines and no coarse scratch tracks.
Perform the Cutting Buff Stage with Brown Tripoli Compound
Lingering or pressing too hard overheats cast aluminum, baking compound into porous surfaces and causing dark stains.
Mount a firm, spiral-stitched buffing wheel and apply brown Tripoli cutting compound to the spinning wheel. Work across the metal using smooth, overlapping passes:
-
Keep the wheel moving: Maintain continuous motion across casting contours to prevent hot spots. Never park the wheel in one place.
-
Apply light-to-moderate pressure: Let the abrasive cut the metal rather than forcing the tool down.
-
Monitor residue: A heavy black film is normal as the compound removes micro-scratches.
Wipe the entire surface clean with a microfiber towel and isopropyl alcohol or mineral spirits. Removing this residue prevents dragging coarse grit into your finishing wheel.
Checkpoint: Sanding haze should turn into an even, semi-mirror reflection. Sand out any remaining deep scratches with fine-grit paper instead of over-buffing.
Perform the Final Coloring Buff Stage for Maximum Clarity
Coloring refines micro-scratches left by the cut stage, clearing haze to maximize clarity on porous cast aluminum.
Mount a dedicated soft wheel charged lightly with white rouge. Never use a wheel contaminated with coarse compound, and keep all buffing wheels labeled.
-
Buff with light pressure: Make uniform passes across the casting using less downforce than the cut stage.
-
Clear pore entrapment: Inspect cast pores for packed compound and brush them out with a soft nylon brush before residue hardens.
-
Wipe clean: Remove residue with a clean microfiber cloth.
Checkpoint: Look for deep gloss and sharp reflections. If directional scratch lines remain, re-sand or re-cut that section rather than over-coloring.
Set Staged Buffer Speeds for Cutting and Coloring
Proper buffer speed is critical on soft cast aluminum. Running too fast overheats the casting and smears compound into pores, while running too slowly stalls cutting action and loads the wheel.
Set each stage by surface feet per minute (SFPM), wheel diameter, compound, and the wheel and machine manufacturer ratings. The cut stage generally uses more surface speed and pressure than the color stage, but a fixed RPM is not transferable between wheel sizes.
Use our buffing wheel RPM and SFPM chart to calculate a target for your wheel diameter. Before starting, confirm the wheel's maximum RPM rating, keep guards in place, and secure the workpiece according to the machine instructions.
Polish Complex Casting Geometries: Wheels, Manifolds, and Housings
Standard wheels cannot reach tight contours without rounding edges or gouging details. Match your abrasives to component geometry when learning how to polish cast aluminum parts:
-
Wheels: Polish visible outer faces first, followed by spokes, lug pockets, and the barrel. Use small-diameter cartridge rolls inside lug wells to keep transition edges crisp. Never grind aggressively into structural zones to chase deep pitting.
-
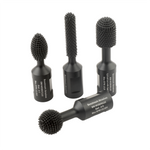
Intake Manifolds: Plan for extended prep time due to rough runner casting texture. Level internal curves using flexible cartridge rolls and miniature flap wheels. Maintain sequential grit progression throughout the runners, then finish tight recesses using mounted felt bobs loaded with buffing compounds.
-
General Castings: Grind down mold parting lines first before leveling surrounding surfaces on brackets and covers. Mask precision mating flanges to protect critical gasket sealing tolerances, and pass between cooling fins using narrow buffing wheels.
Protect and Maintain Your Polished Cast Aluminum Finish
Bare polished aluminum oxidizes quickly without a barrier. To keep your finish from turning cloudy, seal the metal immediately after buffing.
Choose protection based on location and heat exposure:
-
Wheels and Exterior Parts: Apply a metal sealant or ceramic coating to block brake dust and road grime. Reapply according to the product directions and exposure conditions.
-
Engine Bay Components: Use high-temp protectants rated for extreme heat on intake manifolds and valve covers.
-
Clear Coat: Locks in shine permanently, but softens peak reflectivity and can flake if applied directly over mirror-smooth surfaces.
Before coating, wipe the surface with isopropyl alcohol to lift compound residue from the pores. Clean with pH-neutral soap and avoid acid-based degreasers. If you’re doing more than one part, a kit is cheaper than piecing it together.
Frequently Asked Questions About Polishing Cast Aluminum
Can you polish cast aluminum to a mirror finish?
Yes, you can achieve a bright, mirror-like shine on cast aluminum, but it rarely matches the optical clarity of billet. Cast alloys contain silicon and microscopic porosity that scatter light, creating a slight milky haze beneath the surface. This is a normal material characteristic rather than a sanding mistake.
How do you get pitting out of cast aluminum?
Start with the pitting depth test by spot-sanding the damaged area with 220-grit paper for one to two minutes. If the crater rims feather flat, work through your grit ladder to remove them entirely. If sharp edges remain, do not blindly grind deeper. Aggressive grinding risks thinning the casting. On non-critical parts, blend surrounding metal and accept minor pits rather than compromising part geometry.
What grit should you start with on cast aluminum?
Select a starting grit coarse enough to cut through casting texture without creating deep gouges. Start with 80 to 120 grit on rough sand castings with prominent mold peaks and parting lines. For smooth die-cast parts, begin at 220 grit. The golden rule is to establish a flat, uniform profile at your starting grit, then step through each finer grit sequentially without skipping.
Do you have to remove clearcoat before polishing cast aluminum wheels?
Yes, you must strip all factory clearcoat before sanding or buffing. Buffing over clearcoat generates friction heat that melts the coating into an unworkable, cloudy smear while ruining your buffing pads. Apply a dedicated chemical stripper, wash the casting clean, and verify you have reached bare metal before starting the abrasive leveling process.
How long does it take to polish an intake manifold?
Polishing a cast intake manifold can take many hours depending on casting roughness, runner layout, access, and the desired finish. The complex geometry of runners, tight pockets, and structural webbing adds substantial time compared to flat covers. Using small pneumatic tools, cartridge rolls, and flexible sanding cones reduces prep time significantly compared to manual hand sanding.
Should I DIY polish cast aluminum or hire a professional?
DIY polishing is completely achievable for most home mechanics and fabricators equipped with proper dust protection, patience, and rotary tools. Consider hiring a professional service if the part is load-bearing, such as a wheel with structural pitting, or if you lack variable-speed tools to control heat buildup. If you want to handle the project yourself, review a guide to buffing compounds and their uses to match the correct compound colors to your cutting and coloring stages.
Join Our Newsletter
Sign up to get the latest on sales, new releases and more …Join Our Newsletter
Sign up to get the latest on sales, new releases and more …Shop Categories
Recent Articles
- Felt Polishing Discs, Flap Discs & Flap Wheels
- How to Polish a Weld to a Mirror Finish
- How to Polish Cast Aluminum
- Luke Hummer - Erie County Community College
- Industrial Quick Change Discs for Fast-Lock Grinding and Finishing
- Felt Polishing Wheels, Bobs & Discs: Guide to Detail Work
- Matthew Cartwright
- Jacob Martinez (Foxholes to Fabworks)
- The Gathering
- David Fisher (Fisher Forge)
Featured Products
-
 746 Reviews
4-1/2" x 7/8" T29 Zirconia High Density Flap Disc - 10 pack
$25.19
-
 738 Reviews
4-1/2" x .040" x 7/8" t1 premium thin cut-off wheel - 25 pack
$20.88
-
 220 Reviews
4-1/2" x 7/8" T27 Zirconia High Density Flap Disc - 10 pack
$25.19
-
 380 Reviews
6" x .045 x 7/8" T1 Premium Thin Cut-Off Wheel - 25 pack
$27.29
-
 55 Reviews
Nonwoven 6" X 9" Scuff, Clean & Finish Hand Pads
$0.83
-
 123 Reviews
4-1/2" x 1/4" x 7/8" T27 Depressed Center Grinding Wheel - 25 pack
$28.34


Blog Categories
- Abrasives
- Sanding
- Grinding Deburring Finishing
- Safety and Cleanliness
- Metal Working
- Selecting Tools And Equipment
- Wood Working
- Art And Design
- Diy Projects
- Industry 4.0
- Buffing
- Cutting Tools
- Carbide Burrs
- PPE
- Wire Brushes
- Bonded Abrasives
- TIG Electrodes
- Wire Wheels
- Bits
- Diamond Blades
- Power Brushes
- Product Reviews
- Grinding
- Finishing
- Industrial Cleaners