



























How to Polish a Weld to a Mirror Finish

Learning how to polish a weld allows you to transform raw beads on stainless steel, aluminum, or carbon steel into blended, brushed, or mirror finishes without undercutting the parent metal.
This guide helps fabricators, welders, and serious DIYers master the finishing process. Overall difficulty depends on joint access and whether you need to reshape heavy bead geometry or simply remove surface heat tint.
A clean metal finish uses a four-stage workflow:
- Knock down the excess weld crown.
- Blend the toes flush into the base metal.
- Refine scratch patterns across a progressive grit ladder.
- Color buff using matched buffing wheels and polishing compounds.
What you need before starting:
- Required PPE (respirator, eye protection, and work gloves)
- Rigid clamps and clean workholding
- Dedicated abrasives reserved strictly for your target alloy
- Dust control and proper ventilation
Step 1 is reading the weld profile, because the starting tool decides the whole finish.
Classify Weld Geometry and Select Your Starting Abrasive
Polishing metal is controlled scratch replacement. Your starting abrasive sets the deepest scratch depth you must refine later. Starting too coarse gouges the base metal, while starting too fine wastes abrasives and shop time.
Match your weld bead geometry to the right setup:
Weld Profile | Starting Tool & Grit | Application Guidance
Proud bead (high crown) | Grinding wheel or 36-60 ceramic flap disc | Use rigid wheels only for heavy plate. Use 36-60 ceramic flap discs on sheet or tubing to avoid gouging.
Nearly flush / light crown | 60-80 flap disc or resin fiber disc | Blends welds quickly with minimal heat buildup.
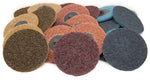
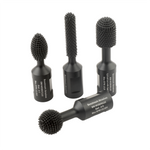
Fillet weld / inside corner | Radius carbide burr or 2"-3" quick-change disc | Shapes inside radii cleanly; prep for unitized or felt wheels later.
Undercut / thin metal risk | 80-120 flap disc or conditioning disc | Use light pressure. Do not chase flush if leveling thins parent metal below spec.
Establish your target finish early. Stop at a No. 4 brushed finish for directional grain (120-180 grit), or progress through micro-grits and buffing compounds for a #8 mirror finish.
Complete these shop prep steps before grinding:
- Mark the weld with a Sharpie as a visual leveling guide.
- Reserve a "stainless-only" abrasive set to avoid cross-contamination and rust.
- Clean the joint with solvent to remove oil, marker ink, and debris.
Success Criteria: You can state (a) target finish, (b) weld profile category, and (c) first tool with starting grit.
Knock Down the Weld Crown to a Controlled Height
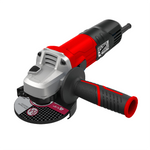
Clamp the workpiece securely, keep the grinder guard in place, and wear a full face shield. Always keep the disc moving across the bead to prevent heat buildup, warping, and deep gouges.
Select the right abrasive for initial knockdown:
- Heavy crowns on thick plate: Use a rigid grinding wheel for aggressive stock removal.
- Smooth control: Use a 36- to 60-grit flap disc. Flap discs run cooler, absorb vibration, and minimize accidental gouges.
Apply proper grinding technique:
-
Work strictly across the bead crown at a shallow 10- to 15-degree angle; do not cut into the base metal.
-
Let the abrasive cut under the tool's weight rather than forcing pressure.
-
On thin sheet metal, make short passes with cool-down pauses, or use a narrow belt file to limit heat transfer.
Stop point: Cease grinding when the crown is flattened and consistent, but the weld toes remain faintly visible.
Success criteria: The bead height is evenly leveled without creating low spots or troughs in the surrounding parent metal.
Blend the Weld Toes Flush with the Base Metal
The weld toe line is what the eye catches first, and sharp transitions can remain visible and may matter in fatigue-sensitive applications. Do not alter a structural weld beyond the approved fabrication specification. Blending this boundary flush is essential to mastering how to polish a weld.
Smooth the initial bead with a flap disc, then switch to an 80-grit resin fiber disc or finer flap disc for controlled feathering.
Key blending techniques:
-
Feather inward: Sweep the abrasive from the parent metal into the weld rather than grinding outward from the seam.
-
Maintain a broad contact patch: Keep the disc at a shallow angle and moving steadily to avoid cutting a low dish next to the joint.
-
Inspect under raking light: Cast low-angle side lighting across the plate and highlight remaining high spots with a Sharpie.
If your project requires a brushed No. 4 finish, this stage defines your final surface quality. Do not advance to finer grits until the toe line disappears.
Success criteria: The weld line transitions smoothly into the base metal. You cannot catch a fingernail along the toe.
Refine the Weld Surface Across a Progressive Grit Ladder
Skipping grits traps coarse scratches beneath fine micro-scratches, leading to haze and visible swirls during final buffing. Remember the core rule: every grit's job is solely to remove the scratches from the grit before it.
The Grit Progression Ladder
Follow this sequential ladder to step down your surface profile consistently:
Grit Stage | Expected Surface Outcome | Finishing Checkpoint
80 → 120 | Eliminates weld grinding marks | Flat baseline with no low spots
180 → 240 | Smooth, uniform satin texture | Ideal stop point for a No. 4 brushed finish
320 → 400 | Fine pre-polish baseline | Semi-reflective surface with light haze
600 → 2000 (Optional) | High-clarity pre-buff surface | Preps metal for mirror buffing (600, 800, 1200, 2000)
The 90-Degree Cross-Hatch Rule
Always rotate your sanding direction roughly 90 degrees between grit steps. Sanding perpendicular to the prior pass makes residual scratch lines instantly visible. Continue until the previous grit pattern is completely erased before stepping up.
Controlling Heat and Scratch Quality
-
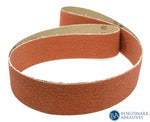
Tooling transitions: Run coarse resin fiber discs or flap discs through 120 grit for initial leveling, then transition to hook-and-loop or PSA sanding discs for finer stages.
-
Lighten pressure: Let the abrasive grain cut under light tool weight as grit numbers climb. Excessive pressure generates heat that can distort thin metal.
-
Wipe between stages: Wipe the work clean with a microfiber towel between each step to prevent loose coarse grains from contaminating finer passes.
-
Wet sand at 600+ grit: Introduce water or lubricant at 600 grit and above to prevent abrasive loading and friction burn.
Success criteria: The metal surface shows only the current grit's uniform scratch pattern with zero random deep lines.
Buff the Welded Seam to a True Mirror Finish
Sanding alone leaves a haze. Mirror clarity comes strictly from matching the right compound and wheel. While industry shops sometimes use sisal wheels, a spiral-stitched cotton wheel paired with cutting compound provides the ideal cut without gouging refined weld seams.
Follow these compound and wheel pairing rules:
- Cut stage: Removes fine sanding haze.
- Color stage: Brings out final optical clarity.
- Wheel dedication: Dedicate separate wheels per compound. Cross-contaminating a finishing wheel with coarse abrasive reintroduces scratches.
The Two-Stage Buffing Sequence
-
Cut Buff: Mount a spiral-stitched cotton wheel loaded with a cutting compound (such as black emery, brown Tripoli, or gray stainless compound). Work along the seam using light to moderate pressure to level fine sanding haze.
-
Clean and Inspect: Wipe away residue with a clean microfiber cloth. Inspect under bright, raking light before moving to the next stage.
-
Color Buff: Switch to a separate, loose cotton wheel charged with a fine finishing compound (such as white rouge or white diamond). Buff lightly across the seam until the reflection sharpens.
Equip your shop with our buffing kits, buffing wheels, and buffing compounds. For compound selection rules, review our guide to buffing compounds and their uses. If polishing broad sheet surfaces beyond the weld seam, see our guide on how to polish stainless steel.
Verification: Reflection sharpens across the seam with no compound haze bands or swirl trails.
Remove Heat Tint and Prevent Stainless Steel After-Rust
Polishing over heat tint does not fix the metal. Buffing over oxidized, chromium-depleted stainless steel traps damaged layers beneath the surface, leading to severe pitting and after-rust.
Diagnose your weld condition before polishing:
- Scratches and geometry flaws: Physical shape issues and coarse grind marks that require mechanical leveling.
- Heat tint and discoloration: High-temperature oxide scale that depletes chromium, reducing corrosion resistance.
Choose the correct removal method:
-
Mechanical abrasion: Required if you need to reshape, level weld toes, or blend profiles.
-
Chemical pickling paste: Best when you only need tint removal without altering base metal geometry.
-
Electrolytic weld cleaning: Can remove discoloration with limited base-metal removal when used according to the equipment and chemical instructions.
Prevent cross-contamination and future rust with these controls:
-
Use dedicated stainless abrasives: Never use wheels, flap discs, or wire brushes previously run on carbon steel. Embedded ferrous particles cause immediate after-rust.
-
Separate tool storage: Store stainless consumables away from carbon steel grinding stations and airborne dust.
-
Clean between stages: Solvent-wipe the weld between grit transitions to remove loose debris.
When to stop and reassess:
-
Orange rust spots appear after finishing: They can signal carbon steel contamination. Follow the applicable cleaning and passivation procedure.
-
Rainbow tint appears while grinding: Indicates excessive tool dwell and heat buildup. Reduce grinding pressure immediately.
Success criteria: Heat tint is completely removed, the base metal is uncontaminated, and the surface remains free of new oxidation or rust spots.
Polish Inside Corners and Fillet Welds with Felt Tooling
Mirror finishes consistently fail in corners because large discs and standard buffing wheels cannot maintain proper contact geometry inside tight joints.
Select the right small-format tooling:
-
Blend with compact abrasives: Shape the weld using 2-inch quick-change sanding discs, cartridge rolls, or small unitized wheels on a die grinder.
-
Buff with felt: Transition to felt bobs or quick-change felt discs loaded with cutting and coloring compounds. Rigid felt is a useful option for color buffing inside tight radii.
Execute corner polishing technique:
-
Maintain light pressure: Let the compound and tool RPM do the work. Heavy pressure distorts the felt profile and overheats the metal.
-
Make smooth, continuous passes: Guide the tool along the weld seam to avoid digging flat spots into the radius.
-
Clean between stages: Buffing compound quickly packs into corners. Wipe the joint clean with solvent and a microfiber cloth before changing compounds.
Success criteria: The fillet radius is uniform and reflective, showing zero flat spots or unblended scratch bands along the corner seam.
Diagnose and Fix Common Weld Polishing Defects
Most finishing flaws stem from excess heat, improper pressure, grit skipping, or cross-contamination. When learning how to polish a weld, never try to buff out defects that require sanding.
Match your defect to the proper recovery step:
-
Skipped Grits: Random deep lines show after buffing. Fix: Back up to the coarse grit that removes them, then re-run the ladder.
-
Excess Pressure or Dwell: Heat tint or warping on thin metal. Fix: Lighten pressure, use shorter passes, allow cooling, or switch to wet sanding.
-
Random Sanding Patterns: Cloudy finish with poor reflection. Fix: Re-establish a uniform directional scratch, then step down using 90-degree cross-hatch passes.
-
Shared Buffing Wheels: Persistent swirl marks that will not clear. Fix: Dedicate separate wheels per compound. Clean with a buffing rake or replace the wheel.
-
Carbon Contamination: After-rust spots on stainless welds. Fix: Decontaminate, repickle, or electro-clean the joint, then switch strictly to stainless-only abrasives.
Standard Inspection Routine:
- Wipe all residue from the joint before changing grits.
- Inspect the surface under direct, low-angle raking light.
- Advance only when the scratch pattern is completely uniform.
Frequently Asked Questions About Polishing Welds
Can you polish a weld to a true mirror finish?
Many welds can be polished to a mirror finish when the approved weld profile allows leveling and the full grit sequence is followed. The primary limiters are joint access and patience. Tight inside corners require specialized miniature felt bobs, and skipping steps in the abrasive sequence will leave cloudiness under final reflection.
What grit should you start with when grinding a weld?
Start with the finest grit capable of leveling the bead crown without stalling your progress. For heavy, proud beads on thick plate, begin with a 36- or 60-grit flap disc. For light, nearly flush beads on sheet metal, start at 80 grit to avoid gouging parent metal. See our weld profile guide in Step 1 for exact tool pairings.
How do you remove weld discoloration on stainless steel?
Remove weld discoloration using mechanical abrasives, pickling chemical paste, or an electrolytic weld cleaner. Discoloration indicates high-temperature oxidation that pulls chromium from the surface, reducing corrosion resistance. If the bead is already flush, electrolytic cleaning removes the heat tint without removing base metal. If the weld needs shaping, progress through mechanical sanding discs instead.
Why did my polished stainless weld start rusting?
After-rust on polished stainless steel usually comes from ferrous cross-contamination or incomplete heat-tint removal. Using a grinding disc, wire wheel, or buffing pad that previously contacted carbon steel embeds iron particles into the stainless surface. Always dedicate separate abrasives strictly for stainless projects and wipe the joint clean with solvent between grit stages.
Do you have to grind a weld completely flat before polishing?
You must grind the weld if the bead is proud or uneven and you want a smooth surface. Grinding levels the crown and blends the weld toes into the parent metal. If the weld is already flush, structural, or meant to show a clean TIG bead profile, skip coarse grinding and proceed directly to surface conditioning or buffing.
Can you polish welds yourself or should you hire a professional?
Polishing welds is manageable for DIYers and fabricators working on automotive parts, handrails, or custom furniture. The work requires the right abrasive sequence, suitable PPE, and a dedicated setup such as our buffing kits. Hire a professional metal finisher if you are dealing with sanitary food-grade specifications, high-tolerance aerospace parts, or broad, thin-gauge sheet metal with high warping risks.
Join Our Newsletter
Sign up to get the latest on sales, new releases and more …Join Our Newsletter
Sign up to get the latest on sales, new releases and more …Shop Categories
Recent Articles
- How to Polish a Weld to a Mirror Finish
- How to Polish Cast Aluminum
- Luke Hummer - Erie County Community College
- Industrial Quick Change Discs for Fast-Lock Grinding and Finishing
- Felt Polishing Wheels, Bobs & Discs: Guide to Detail Work
- Matthew Cartwright
- Jacob Martinez (Foxholes to Fabworks)
- The Gathering
- David Fisher (Fisher Forge)
- Hunter Smith (Lost Socket Garage)
Featured Products
-
 746 Reviews
4-1/2" x 7/8" T29 Zirconia High Density Flap Disc - 10 pack
$25.19
-
 738 Reviews
4-1/2" x .040 x 7/8" T1 Premium Thin Cut-off Wheel - 25 pack
$20.88
-
 220 Reviews
4-1/2" x 7/8" T27 Zirconia High Density Flap Disc - 10 pack
$25.19
-
 380 Reviews
6" x .045 x 7/8" T1 Premium Thin Cut-Off Wheel - 25 pack
$27.29
-
 55 Reviews
Nonwoven 6" x 9" Scuff, Clean & Finish Hand Pads
$0.83
-
 123 Reviews
4-1/2" x 1/4" x 7/8" T27 Depressed Center Grinding Wheel - 25 pack
$28.34


Blog Categories
- Abrasives
- Sanding
- Grinding Deburring Finishing
- Safety and Cleanliness
- Metal Working
- Selecting Tools And Equipment
- Wood Working
- Art And Design
- Diy Projects
- Industry 4.0
- Buffing
- Cutting Tools
- Carbide Burrs
- PPE
- Wire Brushes
- Bonded Abrasives
- TIG Electrodes
- Wire Wheels
- Bits
- Diamond Blades
- Power Brushes
- Product Reviews
- Grinding
- Finishing
- Industrial Cleaners