


























The Best Abrasive Setup for Weld Blending on Mild Steel, Stainless, and Aluminum

Achieving a flawless transition between a weld bead and the base metal is what separates a structural assembly from a piece of professional craftsmanship. Whether you are working on a custom car frame or architectural handrails, the finish determines the perceived quality of the entire build.
Mastering this process requires more than just a steady hand; it also demands a systematic approach to the selection of tools and grits.
In this guide, we will break down the best abrasive setup for weld blending across various metals to help you achieve consistent, shop-quality results every time.
What is the Best Abrasive Setup for Weld Blending?
In the world of metal fabrication, blending welds is the process of removing the raised portion of a weld bead until it is flush with the surrounding metal surfaces. This isn’t just about aesthetics; it’s about surface finishing that prepares the part for paint, powder coating, or polishing. If the blending is done poorly, you’ll see "low spots" or gouges that are impossible to hide later.
The best abrasive setup for weld blending involves a multi-stage system. You can rarely achieve a high-quality finish from a raw weld with a single tool. Instead, you need the right abrasive for each phase: cutting, grinding, blending, and finishing. By following a step-by-step system, you balance the need for speed with the requirement for a desired finish. This approach prevents the metal from overheating and ensures that you don't remove too much base metal while attempting to make the seam flatter.
Understanding the Welding Process and Its Impact on Blending
Before you grab your grinder, you have to consider the welding process used. A MIG welding (Gas Metal Arc Welding) pass often leaves more spatter and a higher, wider weld bead than TIG Welding. This means you’ll need a more aggressive initial setup to knock down the excess material. On the other hand, TIG Welding produces a much cleaner, flatter profile that may allow you to skip the heaviest grinding stages.
Newer technologies like laser welding create extremely narrow weld seams that require very little surface prep. However, regardless of the method, you must account for the heat-affected zone. If you used high heat during arc welding, the base metal might be slightly harder or more prone to discoloration. Understanding how your weld passes bonded with the metal helps you choose an abrasive that will cut efficiently without "glazing" over or loading up with slag.
Types of Abrasives Used for Weld Blending
The sheer variety of types of abrasives can be overwhelming for a beginner. However, they generally fall into a few functional categories based on their abrasive materials and abrasive grains.
-
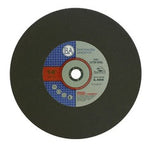
Grinding wheel and grinding disc: These are the heavy hitters. They are designed for maximum material removal but leave a very rough scratch pattern.
-
Resin fiber discs and sanding discs: These provide a flatter contact area than a grinding wheel, making them excellent for intermediate smoothing.
-
Abrasive flap discs: These are the most versatile tools in the shop. They combine the aggressive cutting of a grinding disc with the finishing capabilities of sanding discs.
-
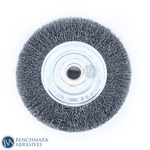
Wire Wheels and flap wheels: These are used for cleaning spatter or providing a specific surface texture rather than removing the weld bead itself.
-
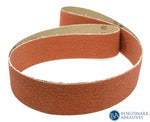
Abrasive belts: Often used in stationary grinders or file sanders for reaching tight areas.
Choosing between zirconia and ceramic grains will depend on the hardness of your metal, which we will detail in the material-specific sections below.
Step-by-Step Abrasive Setup for Weld Blending
To get a seamless look, you have to work in stages. Attempting to skip from a raw weld to a fine finish usually results in visible "halos" around the weld site.
Step 1 – Initial Cut and Heavy Stock Removal
The goal of the first step is heavy stock removal. You want to take the "crown" off the weld bead as quickly as possible without thinning the surrounding metal. A standard grinding wheel is the traditional choice here, but many modern fabricators prefer cut-off wheels or cutting discs used at a slight angle for precision trimming of the bead.
If the weld was preceded by plasma cutting or oxyfuel cutting, ensure you’ve removed any dross or hardened edges before you begin. Use a coarse grit (typically 24 or 36) to move through the excess material efficiently.
Safety Warning: Always wear a full face shield and ensure your grinder’s safety guard is positioned between you and the sparks. Grinding wheels can shatter if they are cracked or used at the wrong angle.
Step 2 – Intermediate Grinding and Shaping
Once the weld is nearly flush, switch to an intermediate grinding disc. This is where you transition from aggressive cutting to controlled shaping. For this stage, zirconia alumina or ceramic alumina are the preferred abrasive grains.
Ceramic grain is particularly effective because it stays sharp as it breaks down, maintaining high cut rates throughout the grinding process. A grit size of 60 to 80 is standard for weld grinding at this stage. This removes the deep gouges from Step 1 and begins to level the weld with the base metal.
Step 3 – Blending and Surface Conditioning
In Step 3, you move toward surface conditioning. The goal is to make the transition between the weld and the base metal invisible to the touch. This involves reducing the scratch pattern left by the previous discs.
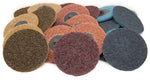
Surface preparation at this stage usually involves abrasive flap discs or non-woven surface conditioning discs. These tools are more forgiving and help you achieve a consistent finish across the entire part. This surface prep is vital if the part is going to be plated or painted with a high-gloss finish.
Step 4 – Final Finishing and Polishing
The final step is all about the desired finish. If you need a smooth finish for a painted part, a finer grit (120 to 220) sanding disc is usually enough. However, if you are working on architectural stainless and need a mirror finish, you will move into specialized polishing pastes and felt wheels. Achieving a high-quality finish at this stage is only possible if the previous steps were done correctly; any remaining scratches will be magnified once the metal is polished.
Choosing the Right Abrasive for Different Metals
The best abrasive setup for weld blending changes significantly depending on the material's hardness and thermal conductivity.
Carbon Steel and Mild Steel Applications
Carbon steel and mild steel are ferrous metals that are relatively easy to grind. Because they can handle significant heat, you can use high-pressure applications and aggressive grinding discs. A standard zirconia alumina flap disc is often the most cost-effective solution here. Focus on surface prep that removes all mill scale around the weld to ensure paint adhesion later.
Stainless Steel Applications
Stainless steel is much more sensitive to heat and contamination. Using the wrong abrasive can lead to "blueing" or even future rust if the abrasive grains contain iron. For a high-quality finish on stainless, always use "contaminant-free" abrasives (marked with "INOX"). Ceramic grains are the right abrasive for stainless because they cut cooler, reducing the risk of heat-tinting. Surface conditioning discs are essential here to match the existing grain of the sheet metal.
Aluminum and Softer Metals
Aluminum is a "gummy" metal. It has a low melting point, which causes it to load or clog standard abrasive materials almost instantly. To blend welds on softer metals, avoid high-pressure. Instead, use abrasives specifically designed for aluminum, which often feature a stearate coating to prevent loading. Silicon carbide is sometimes used for its sharpness, but specialized ceramic discs for aluminum are usually the fastest way to clean up these metal parts.
Power Tools and Equipment for Weld Blending
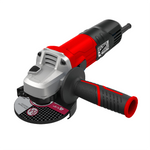
Your abrasives are only as good as the tools driving them. The angle grinder (specifically the right-angle grinder) is the primary tool for most blending. For larger welds, a 4.5-inch or 5-inch grinder provides the best balance of power and maneuverability.
For detailed work or to reach areas like the inside of a pipe or a tight corner, a die grinder is essential. When using resin fiber discs, always use a high-quality backing pad; a pad that is too soft will cause the disc to round over the edges of your weld, while a hard pad provides the flat support needed for a level finish. Always match the RPM rating of your power tools to the rating on your abrasive disc to prevent tool failure.
Grit Size and Abrasive Selection Guide
Managing your grit size is the key to a consistent finish. A common mistake is staying with a coarse grit for too long.
- Coarse Grit (24–36): For knocking down the heavy weld bead.
- Medium Grit (60–80): For leveling and initial blending.
- Finer Grit (120+): For removing the scratch pattern and prepping for paint.
By following this progression, you ensure that the final desired finish is uniform across the entire surface.
Common Mistakes in Weld Blending (And How to Avoid Them)
One of the most frequent errors is applying too much high pressure. This generates excessive heat, which can warp thin-gauge metal and wear out your abrasives prematurely. Let the tool carry it. Another mistake is skipping a grit size to save a little bit of time. In reality, skipping steps leads to more work in the long run because the finer discs have to work twice as hard to remove the deep scratches left by the coarse ones.
Choosing the correct abrasive for the specific metal is also vital. Using a disc that was previously used on carbon steel to blend a stainless weld will cause the stainless to rust. Spend less time fixing mistakes by keeping your abrasives organized by material type.
Tips for Efficient and Professional Results
Experienced metal fabricators know that the "angle of attack" matters. When you first start blending, hold the grinder at a 15 to 30-degree angle to the weld. As you get closer to flush, flatten the angle to blend into the base metal.
In metalwork, consistency is king. Use long, sweeping strokes rather than short, choppy ones to avoid creating divots. These best practices will help you reach your desired finish faster while maintaining a consistent finish across large panels.
Specialty Tools for Hard-to-Reach Areas
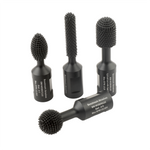
Not every weld is on a flat plate. For reach areas like the inside of a fabricated manifold or a tight "V" joint, you may need a die grinder with a carbide burr. These are excellent for removing sharp edges in confined spaces. Wire brushes and wire wheels can also be used to clean out the root of a weld where a disc cannot fit. Precision is key in these detailed areas to ensure the structural integrity of the joint isn't compromised while cleaning it up.
Additional Tools Used Alongside Abrasives
Sometimes, the best way to blend a weld is to prepare the metal properly before you ever strike an arc. Using high-quality Saw Blades for clean cuts reduces the amount of gap-filling needed. During the blending process, you might also use cut-off wheels to cut excess weld tabs or cutting discs to notch out a section for a restart. A grinding wheel is your primary tool, but these secondary tools ensure the entire workflow remains efficient.
From Rough Welds to Flawless Finishes
The best abrasive setup for weld blending is systematic. From heavy stock removal to surface conditioning and final polishing, you're sure to achieve a high-quality finish that performs as well as it looks. Remember that the material, whether carbon steel, stainless, or aluminum, determines your choice of abrasive grain and tool speed.
Proper grit progression is the secret to a consistent finish in any metalwork project. By matching your abrasives with the right tools and following best practices, you can reduce your shop time and produce professional-grade results.
Upgrade your weld blending process with high-performance abrasives from Benchmark Abrasives. We offer a complete range of grinding wheels, flap discs, and surface conditioning tools specifically designed for professional results.
Join Our Newsletter
Sign up to get the latest on sales, new releases and more …Join Our Newsletter
Sign up to get the latest on sales, new releases and more …Shop Categories
Recent Articles
- Flap Disc vs Fiber Disc: Key Differences & Uses
- Best Surface Conditioning Product for Weld Removal
- Fiber Disc Backing Pads for Angle Grinders: The Ultimate Guide
- 4.5 in Corded Angle Grinder: Complete Buying Guide
- Diamond Blades: Types, Uses, and How to Choose the Right One
- Best Abrasive for Stainless Steel: Avoid Heat Tint and Contamination
- Wire Wheel vs Flap Disc: Best for Rust, Paint, and Welds
- The Best Abrasives for Aluminum: How to Cut, Grind, and Finish without Loading Up
- Drum Sanders and Linear Finishing Tools for Precision Surface Finishing
- How to Pick the Right RPM, Grit, and Pressure for Better Grinding Results
Featured Products
-
 746 Reviews
4-1/2" x 7/8" T29 Zirconia High Density Flap Disc - 10 pack
$25.19
-
 734 Reviews
4-1/2" x .040 x 7/8" T1 Premium Thin Cut-off Wheel - 25 pack
$20.88
-
 220 Reviews
4-1/2" x 7/8" T27 Zirconia High Density Flap Disc - 10 pack
$25.19
-
 380 Reviews
6" x .045 x 7/8" T1 Premium Thin Cut-Off Wheel - 25 pack
$27.29
-
 123 Reviews
4-1/2" x 1/4" x 7/8" T27 Depressed Center Grinding Wheel - 25 pack
$28.34
-
 55 Reviews
Nonwoven 6" x 9" Scuff, Clean & Finish Hand Pads
$0.83


Blog Categories
- Abrasives
- Sanding
- Grinding Deburring Finishing
- Safety and Cleanliness
- Metal Working
- Selecting Tools And Equipment
- Wood Working
- Art And Design
- Diy Projects
- Industry 4.0
- Buffing
- Cutting Tools
- Carbide Burrs
- PPE
- Wire Brushes
- Bonded Abrasives
- TIG Electrodes
- Wire Wheels
- Bits
- Diamond Blades
- Power Brushes
- Product Reviews
- Grinding
- Finishing
- Industrial Cleaners