



























Abrasive Grit Guide for Sanding Discs and Metalworkers

In the world of metal fabrication, your choice of abrasive is just as important as the welder or the torch you use. Choosing the right sanding disc affects everything from your removal rate to the final surface finish and the overall cutting performance of your tools. Whether you are hacking through heavy weld beads or trying to achieve a mirror-like shine on a custom part, understanding the nuances of grit is essential.
This blog post serves as a comprehensive guide for those looking to master their sanding tasks. We will cover the full spectrum of grit levels, ranging from heavy stock removal to final sanding and fine polishing.
We will also dive into the technical differences between PSA vs Hook and Loop disc backings and how the type of abrasive grain you choose can make or break your project. Consider this your grit-selection hub for all things metal.
Understanding Grit Numbers (How Grit Actually Works)
Grit isn't just a random number assigned to a disc; on backing material, it is the number of abrasive particles per square inch. This mathematical relationship is the foundation of our grit guide and dictates how the disc will interact with the metal.
The rule of thumb is simple: lower grit numbers mean larger abrasive particles. Because these particles are bigger, they create a more aggressive cutting action that digs deep into the material. Conversely, a higher grit number indicates a finer abrasive with much smaller abrasive particles. These are used to create a smoother surface finish by removing the scratches left behind by the coarser discs.
When looking at a sandpaper grit chart, you will typically see a range of grits categorized like this:
- Coarse: 24 to 60 grit
- Medium: 80 to 120 grit
- Fine: 150 grit to the 220 grit
- Very Fine/Polishing: 320 grit and above
Types of Abrasives and Why They Matter
While grit size determines the "depth" of the cut, the material of the abrasive grain determines its "strength" and longevity. There are several abrasive materials used in coated abrasives, and each has a specific role in metal fabrication.
Aluminum oxide discs: These are the workhorses of the industry. They are a great general-purpose type of abrasive that works well on most metals. They are affordable and reliable for standard sanding project needs.
Zirconia alumina: This is a step up for heavy-duty applications. It is a self-sharpening grain that excels under high pressure, making it ideal for grinding hard and durable materials such as carbon steel
Ceramic abrasives: If you need aggressive material removal on stainless steel or high-nickel alloys, ceramic grain is the king. It stays cool and stays sharp, significantly improving cutting performance on hard materials.
Silicon carbide discs: These are typically reserved for a finer finish or specialty applications. Silicon carbide is sharp but brittle, making it perfect for non-ferrous soft metals and final polishing stages.
Open Coat vs Closed Coat and Why Coating Density Matters
Beyond the grit and the grain, you have to consider how the particles are spaced. This is referred to as the coating density.
A closed coat disc means the abrasive particles cover 100% of the surface. This is the standard for stainless steel and other hard surfaces where you want maximum cutting action. However, when working with soft metals or removing old paint and coats of paint, a closed coat can clog quickly.
An open coat disc has spaces between the particles (usually covering 50% to 70% of the surface). This extra space allows debris and dust to escape, preventing clogging and reducing heat buildup. If you are dealing with rough surfaces with heavy buildup, an open coat is often the better choice for heavy-duty cleaning without damaging the disc.
Backing Material: PSA vs Hook and Loop Discs
The way your disc attaches to your tool is more than just a convenience; it affects the stability of your sanding. You need to choose the right abrasive backing material for the tool and task at hand.
PSA discs (Pressure Sensitive Adhesive) use a sticky backing that bonds directly to the tool's platen. These provide a very strong bond and a flat profile, making them the right sanding disc for production sanding on flat surfaces where you don't want any "cushion" between the tool and the metal.
Hook and Loop discs use a fabric backing that "velcros" to the tool. These are the go-to for a multi-step sanding process because they allow for incredibly quick grit changes. They are commonly used with orbital sanders and random orbital sanders for general surface blending and smoothing.
For small touch-ups or areas where power tools can't reach, you can also use these discs for hand sanding by attaching them to specialized sanding blocks.
Grit Breakdown by Application
24–40 Grit – Heavy Stock Removal
This is the beast mode of the grit range. When you are performing heavy material removal, such as grinding down a massive weld bead or beveling a thick plate, you need coarser grits. These are typically used with an angle grinder and heavy-duty grinding discs or resin fiber discs. Be warned: this grit level removes much material very quickly but leaves deep scratches that will require several more steps to smooth out.
60–80 Grit – Rough Sanding & Surface Prep
This medium grit range is the sweet spot for surface preparation. It is aggressive enough for rust removal and stripping off old paint, but it won't gouge the metal as deeply as 36-grit. If you have a workpiece with rough metal surfaces that needs to be cleaned before welding or coating, 80-grit is often the best starting point.
100–120 Grit – General Purpose Metalwork
For most general-purpose metalwork, 120 grit is the most versatile choice. It is excellent for surface blending and removing the scratches from the rough sanding stage. In many production environments, aluminum oxide discs in this grit range are the standard for finishing a part before it moves to the paint booth.
150–220 Grit – Pre-Finish Smoothing
As you move into finer grits, the goal shifts from removal to refinement. 220 grit is used for final sanding to clear scratches and prepare the metal for a primer or a brushed finish. This is especially important for stainless steel, where you want a finer finish that looks uniform.
320+ Grit – Final Finish & Fine Polishing
Once you pass 320 grit, you are entering the world of high grit and fine polishing. A finer abrasive in this range is used to achieve a mirror finish or a high-gloss cosmetic look. This stage requires patience and a multi-stage sanding process, moving through the grit levels incrementally to ensure the desired finish is achieved.
Matching Grit and Metal Type
Not all metals respond to the same grit range in the same way.
- Stainless steel: This is a work-hardening metal. If you start with a grit that is too coarse, you can create deep scratches that become permanent. It is often better to start with a slightly higher grit and use ceramic abrasives to keep the heat down.
- Cast iron: Because it is brittle and hard, cast iron requires durable abrasives like zirconia alumina in the coarser grits for initial cleaning.
- Soft metals: Aluminum and brass can "load" or clog a disc almost instantly. Use an open coat disc and avoid the lowest grit numbers to prevent the metal from melting into the abrasive.
Tool Pairings: Disc Type + Tool = Performance
The right sanding disc only works if it is paired with the right tool.
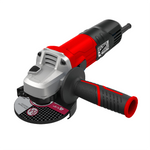
- Angle grinder: Best for heavy stock removal using grinding discs or resin fiber discs. It provides the high torque needed for aggressive cutting.
- Quick Change Discs: These are perfect for small-scale surface blending. They allow for fast transitions between grits, which speeds up the cutting performance in tight spaces.
- Power Tools (Random Orbital): These are the gold standard for finishing. The random motion prevents swirl marks, allowing you to move through the grit levels for a perfectly smooth finish.
Common Errors in the Selection of Grit
The most common mistake in the sanding process is starting with the lowest grit possible "just to be safe." If you use a 36-grit disc on a piece that only needs light rust removal, you are creating unnecessary work for yourself by having to sand out those deep scratches.
Another frequent error is skipping grit levels. If you move from 80-grit directly to 320-grit, you will never remove the 80-grit scratches. You might get a shiny surface, but the deep gouges will still be visible underneath the polish. For best results, never skip more than one grit level in the sequence (e.g., 80 to 120 to 180).
Quick Grit Selection Table
| Grit Range | Task | Tool | Outcome |
| 24 – 40 | Heavy stock removal / Welds | Angle Grinder | Rough / Beveled |
| 60 – 80 | Rust removal / Prep | Random Orbital / PSA | Clean / Matte |
| 100 – 150 | Surface blending | Random Orbital / Hook & Loop | Smooth / Uniform |
| 180 – 220 | Pre-finish smoothing | Random Orbital | Fine / Satin |
| 320 – 600 | Fine polishing | Sanding Blocks / Hand Sanding | Near Mirror |
Frequently Asked Questions
What grit for rust removal?
For heavy rust on structural steel, start with 60 or 80 grit. For light surface rust on a delicate part, 120-grit is often sufficient.
What grit for a stainless steel finish?
To get a classic "brushed" look, most fabricators finish with 120 or 180 grit. For a mirror finish, you must work your way up to 600 grit or higher.
What grit for heavy stock removal?
Stick to the 24 to 40 grit range using a resin fiber disc for the fastest removal rate.
What grit for paint removal?
80-grit is the standard for stripping paint. It is coarse enough to cut through the layers but fine enough to avoid damaging the base metal.
From Aggressive Cutting to Mirror Finish, Choose the Right Tools for Success
As we’ve seen in this ultimate guide, the sanding process is a science of increments. Grit, abrasive type, and backing material all work together to determine the quality of your work. By choosing the right sanding disc for every stage of your project, you ensure a higher removal rate and a professional finish that stands up to scrutiny.
Metal fabrication is a demanding trade, but with the right abrasive knowledge, you can tackle any sanding task with confidence. We encourage you to reference this complete guide before starting your next project.
Join Our Newsletter
Sign up to get the latest on sales, new releases and more …Join Our Newsletter
Sign up to get the latest on sales, new releases and more …Shop Categories
Recent Articles
- Resin Fiber Discs vs Flap Discs: When Should You Use Each?
- Best Abrasives for Rust Removal on Steel
- Cut-Off Wheels vs Band Saws: Which is Better for Metal Cutting
- How to Optimize RPM Abrasive Disc Performance & Lifespan
- Surface Conditioning Discs: A Fabricator's Guide
- Best Flap Disc for Stainless Steel: Complete Fabricator’s Guide
- Ceramic vs Zirconia Flap Discs: Which Performs Better for Metal Fabrication
- How to Choose the Right Grit for Metal Sanding Projects
- Tools Collection for Fabrication and Abrasive Workflows
- How to Choose the Right Diamond Blade
Featured Products
-
 746 Reviews
4-1/2" x 7/8" T29 Zirconia High Density Flap Disc - 10 pack
$25.19
-
 738 Reviews
4-1/2" x .040" x 7/8" t1 premium thin cut-off wheel - 25 pack
$20.88
-
 220 Reviews
4-1/2" x 7/8" T27 Zirconia High Density Flap Disc - 10 pack
$25.19
-
 380 Reviews
6" x .045 x 7/8" T1 Premium Thin Cut-Off Wheel - 25 pack
$27.29
-
 55 Reviews
Nonwoven 6" X 9" Scuff, Clean & Finish Hand Pads
$0.83
-
 123 Reviews
4-1/2" x 1/4" x 7/8" T27 Depressed Center Grinding Wheel - 25 pack
$28.34


Blog Categories
- Abrasives
- Sanding
- Grinding Deburring Finishing
- Safety and Cleanliness
- Metal Working
- Selecting Tools And Equipment
- Wood Working
- Art And Design
- Diy Projects
- Industry 4.0
- Buffing
- Cutting Tools
- Carbide Burrs
- PPE
- Wire Brushes
- Bonded Abrasives
- TIG Electrodes
- Wire Wheels
- Bits
- Diamond Blades
- Power Brushes
- Product Reviews
- Grinding
- Finishing
- Industrial Cleaners