


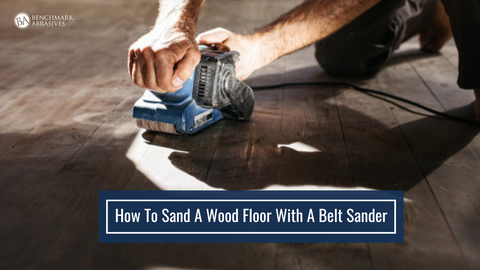
How To Sand A Wood Floor With A Belt Sander
Rugs and carpets often cover wooden floors, hiding their lovely, rich characteristics. Your wooden floors can be sanded, stained, or polished to give the entire space an elegant and costly appearance. You must be familiar with using a belt sander to sand wood floors.
How To Use a Belt Sander To Sand Wood Floor?
A handheld rotary sander and sanding block can smooth a small flooring area. But, you will typically work with large floor surfaces requiring a sanded belt sander. You will still need a sanding block to complete the corners and places where the belt sander can't reach. Remove all drapes, mats, and furniture from the room before sanding. To keep dust off an object you cannot clean, such as a piano, cover it with plastic or a sheet.
You should also wear a face mask and goggles because sanding with a sanding belt generates a lot of dust, so you don't get it in your eyes or lungs. Belt sanders are extremely loud; therefore, you should wear earplugs or defenders.
The amount of sanding required for the floorboards depends on the wooden floor condition:
-
Just sand along the length of the wood to achieve a smoother surface if they are relatively even and clean.
-
You must sand the wood diagonally and then along its length if it is severely bent, marked, or rough.
The grade of abrasive you will use on the floor initially depends on the condition of the floorboards; nevertheless, regardless of the condition of your floor, you will always finish with a 120-grit size.
Normally, you only need three abrasives grades. If you begin with 40 or 60 abrasives, your next abrasives should be 80 or 100, and you should conclude with 120 abrasives.
You must ensure that the area you are working in is sufficiently ventilated before using the belt sander by opening the windows. Remember to seal the areas around the door to prevent dust from escaping into the surrounding area of the building.
To prevent the abrasive face from contacting the floor, angle the belt sander before using it. When you have finished one floorboard's length, tilt it again to remove the abrasives from the surface. If the wood is not moving, never operate the sander while in contact with it. This will result in uneven sanding of the area.
Diagonally Sanding
If your floors need to be level, you must sand them diagonally. Use an abrasive of the appropriate size (40 or 60). Starting in one corner of the space, tilt the sander, turn it on, and move it diagonally across the floor to the other corner.
Before you get to the skirting board in the opposite corner, tilt the machine and lift the abrasives from the wood. Moving parallel to the initial pass, turn around and repeat the procedure. The first pass needs to be overlapped. Repeat this technique when you sand the entire room, slightly overlapping each previous pass.
Repeat the technique described above for the second round of sanding. However, start in a corner close by so that the sander crosses the first round of sanding at a right angle.
Sanding Wood's Length
Use your second grade of abrasion—80 or 100—and start sanding the length of the wood once you have twice sanded the floorboards diagonally, as described above. You could do this sooner if the floorboards were in reasonably intact condition.
Sand the whole length of the room, beginning in one corner. When you reach the other wall, tilt and lift the belt sander, turn it around, and walk it parallel to the previous pass, overlapping as you did with the diagonal sanding procedure.
Once you've completed these two passes, you should tell which one has the grain direction by how smooth the finish is on that pass. Similar to the smooth strip, the remaining passes need to be made. Change to the 120-grit size and continue the sanding process once the second-grade abrasion covers the entire floor. In the end, a handheld sanding block will be required to reach room corners.
Tips for Sanding Wood Floors Effectively
Following are a few important tips to help you sand a wood floor effectively:
-
Work in parts: when sanding wood floors, effectively work in parts to achieve a smooth and even finish. Sanding in smaller parts can also help in reducing fatigue and control dust. It also helps in reducing the chance of creating uneven spots.
-
Take a break in between: sanding the floor requires a lot of strength and power. Therefore, it is crucial to take rest or short breaks in between to avoid fatigue and maintain focus.
-
Test on wood: Always test on a scrap before sanding the actual workpiece. This ensures a better understanding of the sander, its speed, and its techniques for sand. In case of any mistakes it also helps in reducing it and saving your actual material.
-
Avoid applying excessive force: avoid using excessive force while working with belt sanders. Excess force or pressure can cause the sander to dig in creating uneven surfaces and also damaging the workpiece. Therefore, it is crucial to work at moderate speed or the speed required to do the task for smooth and effective results.
CONCLUSION
You may speed up restoring wooden flooring's attractiveness by using a belt sander. Remember to protect your eyes, ears, and lungs, and use the proper abrasives grade.
Join Our Newsletter
Sign up to get the latest on sales, new releases and more …Join Our Newsletter
Sign up to get the latest on sales, new releases and more …Shop Categories
Recent Articles
- 1X30 Sanding Belts for Metalworking & Knife Making
- Why Sanding Belts Stop Cutting Efficiently
- Best Sanding Discs for Automotive Paint Preparation
- How to Change Sandpaper on a Drum Sander
- Sanding Drums for Metal, Finishing, and Deburring
- Sanding Disc Accessories: Backing Pads & Disc Tools
- Random Orbital Sander
- Ways to Remove Rust from Metal
- Select the Right Sanding Belt for Your Next Project
- How Humidity Impacts Sanding Belts
Featured Products
-
 746 Reviews
4-1/2" x 7/8" T29 Zirconia High Density Flap Disc - 10 pack
$25.19
-
 738 Reviews
4-1/2" x .040 x 7/8" T1 Premium Thin Cut-off Wheel - 25 pack
$20.88
-
 220 Reviews
4-1/2" x 7/8" T27 Zirconia High Density Flap Disc - 10 pack
$25.19
-
 380 Reviews
6" x .045 x 7/8" T1 Premium Thin Cut-Off Wheel - 25 pack
$27.29
-
 123 Reviews
4-1/2" x 1/4" x 7/8" T27 Depressed Center Grinding Wheel - 25 pack
$28.34
-
 55 Reviews
Nonwoven 6" x 9" Scuff, Clean & Finish Hand Pads
$0.83


Blog Categories
- Abrasives
- Sanding
- Grinding Deburring Finishing
- Safety and Cleanliness
- Metal Working
- Selecting Tools And Equipment
- Wood Working
- Art And Design
- Diy Projects
- Industry 4.0
- Buffing
- Cutting Tools
- Carbide Burrs
- PPE
- Wire Brushes
- Bonded Abrasives
- TIG Electrodes
- Wire Wheels
- Bits
- Diamond Blades
- Power Brushes
- Product Reviews
- Grinding
- Finishing
- Industrial Cleaners