



























How to Deburr Metal Safely and Efficiently

To deburr metal, clamp the workpiece securely, identify the burr type, choose the right abrasive for your material, remove the raised burr with short controlled strokes, and finish with a finer abrasive or surface conditioning disc. The full process takes 5 to 30 minutes, depending on part complexity.
Before starting, secure your workpiece in a vise or clamp under strong lighting. You will need files, a hand deburring tool, or power options like flap discs and non-woven surface conditioning products. Choose hand tools for tight control, power abrasives for speed, or batch tumbling for high volume. Keep material quirks in mind: aluminum quickly loads up abrasives, while stainless steel can work-harden if overheated.
Classify Burrs and Define Your Edge Target
When learning how to deburr metal, over-deburring is a common mistake that ruins tight tolerances by removing too much metal. Before picking up an abrasive, inspect the workpiece to identify your specific burr type. This includes cut edge burrs, drilled-hole burrs, punched-hole rollover, weld spatter, or machining burrs.
Next, define your target edge based on how the part will be used:
- Edge break: A minimal radius of 0.015 inches or less that only removes sharpness.
- Chamfer: A consistent 45-degree beveled edge to aid part assembly.
- Blend/finish-ready: A uniform scratch pattern to prepare the surface for coatings.
Before starting, protect critical dimensions by marking no-touch features like threads, sealing surfaces, and bearing seats. Drag a shop towel or cotton swab across the metal to safely locate sharp snags without using your fingers. Once your target edge is set, select the fastest deburring tool that protects these functional areas.
Select Your Deburring Tools and Abrasives
Matching your tool to your metal grade prevents heat discoloration and loading. Choose your deburring tools for metal based on workpiece geometry:
- Single parts or tight control: Manual deburring tool or hand file.
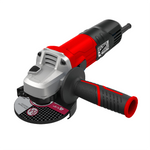
- Weldments or thick stock: Angle grinder with a flap disc.
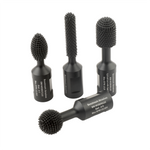
- Tight pockets or inside edges: Carbide burrs on a die grinder.
- Many small parts: Vibratory tumbling.
Match your abrasive grain to the metal:
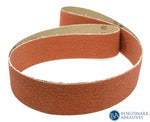
- Mild steel: Aluminum oxide or zirconia. This is the best way to deburr steel while maintaining fast stock removal.
- Stainless steel: Ceramic or zirconia. This keeps the cut cool to prevent heat tint when deburring stainless steel.
- Aluminum: Silicon carbide or ceramic. These resist loading, which is critical for deburring aluminum.
Pair these grains with the right form factor: flap discs for blending, flat sanding discs for uniform scratch patterns, or surface conditioning discs to preserve part dimensions. See our abrasive grit guide to plan your finishing progression.
Next, set up your workspace to control heat and run safely.
Secure Your Workpiece and Set Up Safety Gear
Securing your workpiece is the first rule of how to deburr metal safely. Holding parts by hand causes tool chatter, gouged edges, and severe lacerations.
- Clamp the workpiece: Lock the metal in a bench vise or to a worktable to eliminate all rocking. For thin sheet metal, place clamps within 2 inches of the working edge to prevent vibration.
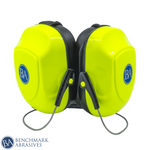
- Gear up: Wear safety glasses, a face shield for grinders, and hearing protection. Use snug-fitting leather gloves. Loose fabric can snag in rotating spindles.
- Clear debris: Use a bench brush or compressed air to clear sharp swarf. Keep your hands away from raw edges.
- Inspect the tool: Check your abrasive disc for cracks. Confirm that the disc's maximum RPM rating exceeds your tool's speed, and position the wheel guard to redirect sparks.
Once secured, you are ready to remove the heaviest burrs first.
Knock Down the Raised Burr with Controlled Passes
To master how to deburr metal, separate material removal from finishing. Do not use high-density flap discs yet. Heavy burrs clog the abrasive and round off functional edges. Start with the least aggressive tool that reliably knocks down the raised burr:
- Hand file: Use a flat file for straight outer edges and a round file for internal holes.
- Hand deburring tool: Best for light burrs on sheet metal.
- Carbide burr: Mount in a die grinder for thick burrs, tight inside corners, or holes near edges.
Execute short, controlled strokes. Keep your tool angle consistent to avoid digging, and never saw back and forth.
If working with aluminum, stop immediately if you feel the metal loading or smearing. For stainless steel, avoid rubbing with dull tools to prevent work-hardening. Cut cleanly and move on.
Verification: The sharp burr ridge is gone, and the edge is smooth to the touch, though not yet finish-ready.
Blend and Finish the Edge with Flap Discs and Sanding Discs
When you deburr metal, blending the edge prevents flat spots and preserves precise part dimensions. Choose your tool path based on your finishing target:
- Angle Grinder and Flap Discs: Mount premium flap discs to quickly smooth heavy weldments or shape structural edges.
- Sander and Sanding Discs: Use a DA sander with flat sanding discs to achieve uniform, flat scratch patterns across the surface.
Follow these steps to transition your edge to a clean, paint-ready finish:
- Select your grit: Start coarse enough to remove deep file marks, then step finer. Map your progression using our abrasive grit guide.
- Apply light-to-moderate pressure: Keep the tool moving constantly to avoid localized heat buildup.
- Break the edge: Work both sides of the metal edge evenly to get a symmetrical radius.
Verification: The edge features a consistent, smooth bevel, and the scratch pattern is completely uniform.
Soften and Blend Edges with Surface Conditioning Discs
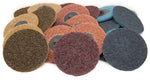
Non-woven surface conditioning discs are the ultimate finishing move in deburring metal. They soften sharp edges with minimal dimension change, blend weld transitions, and create a uniform satin look without gouging the workpiece.
Follow these steps to finish your workpiece:
- Apply light pressure: Let the flexible fiber structure naturally conform to the curves and edges.
- Feather the transition areas: Sweep the tool smoothly to blend out any harsh scratch lines left by coarser grits.
Material considerations:
- Stainless steel: Blends edges cleanly without deep scratches, but monitor heat buildup closely.
- Aluminum: The open-web design resists loading, but keep the tool moving to prevent melting.
Browse our surface conditioning collection to find the right disc for consistent blending and edge softening.
Deburr Holes and Tight Internal Features
Standard countersinks on punched holes or tight slots near part boundaries often cause tool chatter and out-of-round chamfers. This step applies to drilled through-holes, slots, interior cutouts, and holes near edges.
- Choose your tool: Use a hand deburring tool with a rotating swivel blade for light burrs. For heavy burrs, use a rotary die grinder with industrial-grade carbide burrs.
- Execute the cut: Keep the tool centered. Use light pressure and brief, controlled contact to deburr both sides of the hole.
- Adjust for material
- Aluminum: Apply a light lubricant to prevent loading and clear chips frequently.
- Stainless steel: Avoid dwelling in one spot to prevent work-hardening. Cut cleanly and move.
Success check: Drag a cotton swab across the opening. The edge is finished when it does not snag the swab and has a consistent, uniform chamfer all the way around.
Batch Deburr Metal Parts with Vibratory Tumbling
Batch tumbling saves hours when learning how to deburr metal at scale. This method is ideal for processing dozens or hundreds of small parts where consistent edge softening is the goal. Skip the tumbler for parts with knife-edge critical dimensions or delicate external threads, as the media can round off these features.
Select your media based on the material and aggressiveness:
- Plastic media: Best for light deburring and preserving soft metals like aluminum.
- Ceramic media offer a faster cut but increase the risk of rounding corners.
- Wet tumbling: Wet cycles carry away fine dust and improve finish consistency.
Use these guardrails to avoid ruining your parts:
- Separate delicate workpieces to prevent part-on-part damage.
- Run a 15-minute test cycle first.
- Inspect the metal, then extend the time in short increments.
Success check: Look for a consistent edge break across the batch with no battered faces or over-rounded corners.
Verify Quality and Clean Your Workpiece
Professional fabricators never rely on a bare finger to check an edge. Micro-burrs easily slice skin or ruin a premium powder coat. Use this systematic quality check to confirm your part is safe and ready for assembly:
- The Drag Test: Pull a shop towel or cotton swab along all finished edges. Any snagging cotton indicates hidden burrs.
- Visual Check: Inspect the metal under bright, direct light to catch remaining burr lips.
- Fit-Up Check: Slide mating parts together to confirm there is zero physical interference.
Next, clean the workpiece by removing abrasive dust and metal chips. Wipe down surface oils if coating or painting is next. If working with stainless steel, use clean, uncontaminated wipes to prevent surface rust.
If you spot a problem area, return to the least aggressive abrasive that can fix it instead of jumping back to a coarse grit unnecessarily.
Browse our surface conditioning line to achieve a cleaner final blend and a consistent, professional feel.
Pro Tips for How to Deburr Metal
Use specialty burrs and lube to prevent aluminum loading. Aluminum melts and clogs standard tools instantly. Use a non-ferrous, aluminum-cut carbide burr with a small amount of paraffin wax or cutting fluid. If the metal begins to smear, stop immediately and clean the flutes with a wire brush to prevent tool damage.
Keep abrasives moving to avoid work-hardening stainless. Dwelling on stainless steel with a dull tool creates friction that rapidly hardens the metal, making it nearly impossible to cut. Use a sharp ceramic abrasive, maintain moderate feed pressure, and keep the tool moving to manage heat buildup.
Rely on light pressure to prevent gouging. Most gouges happen when you force the tool or dwell in one spot. Use lighter pressure and make multiple passes instead of forcing the cut. This preserves your workpiece dimensions and gives you superior control over the final shape.
Step down grits logically to avoid trapped scratches. Jumping from a coarse grinding disc straight to a fine finishing disc traps deep scratches under a polished surface. Step down in logical increments to erase previous marks. Use our abrasive grit guide to plan your finishing steps.
Unify visible surfaces with non-woven abrasives. For visible parts where cosmetics matter, make your final pass with a surface conditioning tool to blend scratch patterns into a consistent satin finish. Explore our surface conditioning collection to find the right disc for your project.
Frequently Asked Questions About Deburring Metal
What is the best way to deburr steel quickly?
The fastest method depends on the size of the burr. For heavy burrs and weld spatter, use a high-density flap disc on an angle grinder to knock down the bulk material, then refine the finish with a finer abrasive. For light burrs on thin sheet metal, use a manual hand deburring tool and finish with a surface conditioning disc.
How do I deburr stainless steel without overheating or discoloring it?
Prevent heat discoloration and work-hardening on stainless steel by using sharp ceramic or zirconia abrasives. Keep the tool in constant motion and use light to moderate pressure to avoid localized friction. Finish the edge with non-woven surface conditioning products to blend the finish without creating excessive heat.
How do I stop my carbide burr or sanding disc from loading up on aluminum?
Stop aluminum from loading up your tools by applying a steady coat of paraffin wax, cutting wax, or light lubricant to the abrasive surface. Clear chips out of the flutes or disc frequently. If the tool clogs immediately, reduce your operating pressure and switch to a specialized aluminum-cut carbide burr.
What grit should I use for deburring metal?
Start with the finest grit possible that can still knock down the burr. For heavy grinding, start with 40 to 60 grit. For lighter edge breaks, start with 80 to 120 grit, then transition to finer grits to achieve a smooth, paint-ready surface. Refer to our abrasive grit guide to plan your progression.
Is vibratory tumbling worth it for small shops and DIY makers?
Vibratory tumbling is highly worth it for small shops and DIY makers who need to batch-process dozens of small parts with consistent edge softening. Skip the tumbler for parts with critical sharp edges, precise dimensional tolerances, or delicate external threads, as the media can easily round off these features.
Can I deburr metal myself, or should I hire a professional?
Most DIY makers and fabricators can easily deburr metal themselves with basic hand files, deburring blades, and proper personal protective equipment. Hire a professional machine shop if your project demands strict dimensional tolerances, flat sealing surfaces, or high-volume consistency that your home shop cannot match. Benchmark Abrasives provides the industrial-grade tools you need at competitive prices.
Get the Right Abrasives for Your Next Project
Deburring metal is a skill that pays off every time you pick up an angle grinder or die grinder. The right abrasive paired with the right technique means cleaner parts, safer handling, and a finish that holds up to coating, assembly, and daily use. Start with the coarsest grit that gets the job done, step down logically, and finish with a surface conditioning disc for a professional result.
Shop surface conditioning products to finish your deburring jobs with precision.
Join Our Newsletter
Sign up to get the latest on sales, new releases and more …Join Our Newsletter
Sign up to get the latest on sales, new releases and more …Shop Categories
Recent Articles
- How to Choose the Right Diamond Blade for Grinder
- Wire Wheels and Brushes: How to Choose the Right One
- How to Deburr Metal Safely and Efficiently
- How to Reduce Heat Discoloration When Grinding Stainless Steel
- How to Achieve a Mirror Finish on Stainless Steel
- A Fabricator’s Guide to Surface Prep Before Powder Coating
- What Causes Burn Marks During Sanding and Grinding, and How to Prevent Them
- Beginner’s Guide to Metal Surface Prep Before Welding
- How to Choose the Right Abrasive Wheel for Your Grinder
- How to Use a Drum Sander: Step-by-Step Guide for Woodworking
Featured Products
-
 746 Reviews
4-1/2" x 7/8" T29 Zirconia High Density Flap Disc - 10 pack
$25.19
-
 738 Reviews
4-1/2" x .040 x 7/8" T1 Premium Thin Cut-off Wheel - 25 pack
$20.88
-
 220 Reviews
4-1/2" x 7/8" T27 Zirconia High Density Flap Disc - 10 pack
$25.19
-
 380 Reviews
6" x .045 x 7/8" T1 Premium Thin Cut-Off Wheel - 25 pack
$27.29
-
 55 Reviews
Nonwoven 6" x 9" Scuff, Clean & Finish Hand Pads
$0.83
-
 123 Reviews
4-1/2" x 1/4" x 7/8" T27 Depressed Center Grinding Wheel - 25 pack
$28.34


Blog Categories
- Abrasives
- Sanding
- Grinding Deburring Finishing
- Safety and Cleanliness
- Metal Working
- Selecting Tools And Equipment
- Wood Working
- Art And Design
- Diy Projects
- Industry 4.0
- Buffing
- Cutting Tools
- Carbide Burrs
- PPE
- Wire Brushes
- Bonded Abrasives
- TIG Electrodes
- Wire Wheels
- Bits
- Diamond Blades
- Power Brushes
- Product Reviews
- Grinding
- Finishing
- Industrial Cleaners