



























How to Reduce Heat Discoloration When Grinding Stainless Steel

To prevent heat tint when grinding stainless steel, use Inox-rated ceramic abrasives, keep tool speed low, apply light pressure, and move the grinder constantly. The key is cutting the metal rather than rubbing it.
For fabricators working with 304 or 316 stainless steel, controlling heat discoloration is critical for preserving surface integrity and corrosion resistance. The fundamentals are straightforward, but preventing heat tint demands strict discipline around dwell time, tool pressure, and speed.
You will need Inox-rated abrasives, clean backing pads, PPE, and non-woven finishing hand pads. Running a variable-speed grinder is ideal. Always verify your tool speed before starting. For rapid grit progressions, coated abrasive hook and loop discs keep your workflow efficient and minimize heat buildup.
Start by controlling contamination and setting up your tool correctly. A poor setup creates heat no matter which disc you buy.
Establish a Dedicated Stainless Grinding Setup
To reduce heat discoloration during stainless steel grinding, isolate your workflow and prevent contamination before touching the metal.
- Confirm material specs: Identify the alloy (304 or 316) and finish requirements, whether cosmetic or corrosion-critical.
- Isolate consumables: Use dedicated stainless-rated abrasives. Never reuse consumables contaminated with carbon steel, which embeds iron and causes rust.
- Prep your tooling: Replace glazed, loaded, or rounded-over wheels. Dull grains rub instead of cut, generating heat. Always match tool speeds to your disc's rated RPM.
- Clamp the part: Secure the workpiece to eliminate chatter, which causes localized dwell heat.
Success check: You start grinding with a clean, stable part and a sharp, uncontaminated abrasive.
Sequence Your Abrasives to Prevent Heat Build-Up
Matching your abrasive to the job phase is one of the most direct ways to reduce heat discoloration during stainless steel grinding. Dull grains rub and generate friction. Sharp grains slice cleanly.
- Removal: Use a stainless-rated (Inox) ceramic flap disc. The grains self-fracture to stay sharp, cutting cooler with less pressure.
- Blending: Progress incrementally with coated abrasive hook and loop discs. Skipping grits forces high pressure and creates heat.
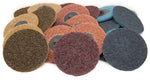
- Finishing: Switch to non-woven surface conditioning discs or finishing hand pads to blend scratch patterns without building heat.
Success check: You can identify your ceramic disc for removal and your non-woven pad for finishing before the job starts.
Dial In Tool Speed and Contact Angle
Managing your grinder's RPM and contact angle directly controls how much heat builds up when grinding stainless steel. Use the understanding RPM ratings guide to verify your disc limits before running any job.
- Set a low speed: Use a variable-speed tool. Start at the lowest setting and increase RPMs only until the abrasive cuts cleanly rather than rubbing.
- Maintain a 15-to-20-degree angle: Keep the disc relatively flat to prevent edge-digging and localized heat buildup.
- Watch for color: If a straw or blue tint appears, immediately reduce pressure and increase your hand speed.
Never exceed the disc's maximum safety limit. Verify your disc's rated RPM before running it.
Success check: The disc cuts efficiently with minimal tool pressure and zero surface discoloration.
Execute the Grind with Pressure Discipline
Strict pressure discipline is what separates a clean stainless grind from one covered in heat tint. Apply light, steady pressure and let the abrasive do the cutting. Over-pressing creates friction and rapid thermal buildup.
Keep the grinder moving constantly using overlapping, lawn-mower-style passes to distribute heat. Work in short bursts on thin material. If the metal becomes too hot to touch comfortably, stop and let it cool. Maintain a uniform scratch direction before stepping to the next grit.
Success check: The surface shows uniform scratch lines with zero color banding, indicating you did not dwell over low spots.
Use Active Cooling and Heat Sinking Techniques
Select a cooling strategy that matches your next process step, such as welding or painting.
- Clamp a heat sink: Use a copper, brass, or aluminum backer plate behind thin-gauge stainless to pull heat away.
- Apply compressed air: Blow clean air during planned cool-down pauses between passes.
- Manage wet coolants: Use controlled water-based cooling if allowed. Dry the part immediately to prevent trapped moisture and floor slip hazards.
- Plan cleaning: Apply grinding waxes sparingly. Completely degrease the surface before downstream welding or chemical passivation.
Success check: The grind zone remains tint-free and free of surface contamination.
Remediate Heat Tint and Verify the Finish
Ignoring heat tint compromises corrosion resistance, undoing all your work to reduce heat discoloration during stainless steel grinding. The colored oxide layer depletes chromium, which invites rust. Assess the discoloration to choose your repair path:
- Light Tint: Use non-woven conditioning pads or finishing hand pads to blend the transition until the finish matches the parent metal.
- Moderate to Heavy Tint: When corrosion resistance is critical, plan for chemical pickling pastes, passivation, or electrochemical cleaning per shop specifications.
Thoroughly clean the surface to remove all abrasive residues and embedded debris. For post-grinding cleanup guidance, see the section on how to clean stainless steel after welding.
Success check: The color is removed, the finish is uniform, and the surface is clean for service exposure.
Frequently Asked Questions About Stainless Steel Grinding
Why does stainless steel discolor so fast when grinding, even with a new disc?
Stainless steel has low thermal conductivity, meaning heat stays trapped at the contact zone instead of dispersing through the metal. If it discolors instantly, you are likely applying too much pressure or running at too high an RPM. Dull or loaded abrasive grains also rub rather than cut, generating extreme friction. Keep your passes fast and light.
What RPM should I run to avoid heat tint on stainless steel?
There is no universal RPM because your optimal speed depends on disc diameter, abrasive type, and your contact style. The best practice is to use the lowest speed that still allows the abrasive to cut cleanly without rubbing. If you see a yellow or blue tint, reduce your speed and pressure immediately. Always verify the maximum safety limits on your disc before running it.
Ceramic vs. zirconia vs. aluminum oxide: which runs cooler on stainless?
Ceramic is the clear winner for cool cutting. Ceramic grains self-fracture, constantly exposing fresh, sharp cutting edges that slice the metal instead of rubbing it. Zirconia can work for heavy grinding but requires high pressure to fracture, which generates heat. Aluminum oxide dulls too quickly on stainless, leading to immediate heat tint.
Do grinding waxes or tallow sticks help, and will they contaminate welding or passivation?
Grinding lubricants reduce friction and heat buildup, but they leave residues behind. If your part requires welding, chemical passivation, or sanitary certification, you must completely degrease the metal afterward. Any leftover wax can ruin weld penetration or prevent the protective oxide layer from forming during passivation.
How do I prevent warping and bluing when grinding thin-gauge stainless sheet?
A thin sheet warps rapidly because it has nowhere to dissipate heat. Keep contact times short by making rapid, overlapping passes and allowing the metal to cool between steps. Clamping a copper or aluminum backer plate behind the weld zone draws thermal energy away. Switch to non-woven blending discs early rather than pushing an aggressive grinding disc to do finish work.
Can I manage stainless passivation myself, or should I hire a professional?
You can handle cosmetic blending and light heat tint removal yourself using non-woven abrasives. However, if your project must meet strict corrosion-resistance standards, such as those in marine environments, chemical processing, or food service, professional electrochemical cleaning or acid pickling is the safer path. For the finishing steps you do handle yourself, choosing the right abrasive progression makes a major difference. Hook-and-loop disc systems give you the most flexibility for grit changes.
Preventing heat discoloration when grinding stainless steel comes down to three things: sharp abrasives, light pressure, and constant tool movement. Master those, and heat tint becomes the exception rather than the rule. For grit progression and finishing flexibility, hook and loop disc systems are your most efficient option.
Join Our Newsletter
Sign up to get the latest on sales, new releases and more …Join Our Newsletter
Sign up to get the latest on sales, new releases and more …Shop Categories
Recent Articles
- How to Choose the Right Diamond Blade for Grinder
- Wire Wheels and Brushes: How to Choose the Right One
- How to Deburr Metal Safely and Efficiently
- How to Reduce Heat Discoloration When Grinding Stainless Steel
- How to Achieve a Mirror Finish on Stainless Steel
- A Fabricator’s Guide to Surface Prep Before Powder Coating
- What Causes Burn Marks During Sanding and Grinding, and How to Prevent Them
- Beginner’s Guide to Metal Surface Prep Before Welding
- How to Choose the Right Abrasive Wheel for Your Grinder
- How to Use a Drum Sander: Step-by-Step Guide for Woodworking
Featured Products
-
 746 Reviews
4-1/2" x 7/8" T29 Zirconia High Density Flap Disc - 10 pack
$25.19
-
 738 Reviews
4-1/2" x .040 x 7/8" T1 Premium Thin Cut-off Wheel - 25 pack
$20.88
-
 220 Reviews
4-1/2" x 7/8" T27 Zirconia High Density Flap Disc - 10 pack
$25.19
-
 380 Reviews
6" x .045 x 7/8" T1 Premium Thin Cut-Off Wheel - 25 pack
$27.29
-
 55 Reviews
Nonwoven 6" x 9" Scuff, Clean & Finish Hand Pads
$0.83
-
 123 Reviews
4-1/2" x 1/4" x 7/8" T27 Depressed Center Grinding Wheel - 25 pack
$28.34


Blog Categories
- Abrasives
- Sanding
- Grinding Deburring Finishing
- Safety and Cleanliness
- Metal Working
- Selecting Tools And Equipment
- Wood Working
- Art And Design
- Diy Projects
- Industry 4.0
- Buffing
- Cutting Tools
- Carbide Burrs
- PPE
- Wire Brushes
- Bonded Abrasives
- TIG Electrodes
- Wire Wheels
- Bits
- Diamond Blades
- Power Brushes
- Product Reviews
- Grinding
- Finishing
- Industrial Cleaners