





























How to Use a Drum Sander: Step-by-Step Guide for Woodworking

The drum sander is a powerful and rewarding tool in any wood shop. Mastering its use is essential, whether you're working on a large surface like a tabletop or taking on a huge project like refinishing a house. Knowing how to operate a drum sander correctly is the key to transforming a piece of raw wood into a masterpiece, rather than ruining the workpiece.
A drum sander is a beast for woodworking projects. While a random orbital sander is great for finesse, the drum sander is built for high-output sanding jobs and aggressive leveling.
However, for flat, uniform, and great results, nothing beats the consistent, linear scratch pattern of a drum sander. Whether you are a first-time DIYer renting a drum floor sander or a seasoned professional, this guide will make sure your drum sander use is safe and effective.
Step 1: Safety First – Gear Up Properly
Before you even think about plugging in the machine, you need to address the safety issues inherent in using a high-torque, rotating sanding drum. A drum sander is essentially a giant, spinning abrasive cylinder that can generate incredible heat and massive amounts of fine particulate.
Required Protective Gear
- Safety Glasses: High-velocity dust can easily bypass standard spectacles. Make sure you have wrap-around protection.
- Dust Mask / Respirator: This is non-negotiable. Wood dust is a known carcinogen and a major respiratory irritant.
- Ear Protection: Drum sanders, especially large floor models, produce decibel levels that can lead to permanent hearing loss. Use high-quality hearing protection or muffs.
- Gloves: While gloves are great for handling rough lumber, be extremely careful near the intake of the drum to avoid "snag" hazards.
Dust Management
A common safety issue is the accumulation of combustible wood dust. Ensure your dust collection system is robust. Most professional drum sanders feature a port for a shop vac or industrial extractor. If you are using a portable unit with a dust bag, empty it frequently. Effective dust extraction keeps the abrasive from "loading" and keeps your workspace clear so you can see your progress.
Step 2: Preparing Your Workspace and Wood Surface
Success starts with a clean wood surface. If you are working on an old floor, you must make sure every single nail or staple is countersunk. A single protruding nail will tear your expensive abrasive belts in a split second.
When getting ready for woodworking projects, first identify any problem areas like uneven sanding from prior work, deep scratches, or challenging end grain. If you are refinishing a room, ensure it's empty. In the first room you work on, plan your sanding path carefully to avoid getting stuck in a corner. For a very uneven floor, your initial pass should be at a slight angle (about 7 to 15 degrees) across the grain; this technique levels the boards better than sanding perfectly parallel to the grain.
Step 3: Drum Sander Basics and Accessories
Understanding the anatomy of your machine is key to achieving professional-looking results.
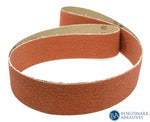
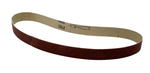
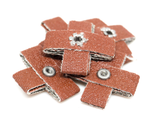
The heart of the tool is the sanding drum. Depending on the model, you will use either sanding rolls (which you wrap and tuck) or abrasive belts (which slide on).
- Drum Height: This is your most important adjustment. It determines the material you remove.
- Belt Tracking: On conveyor-style shop sanders, make sure the belt is centered. If it drifts, it will fray the abrasive's edges.
Essential Accessories
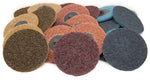
Don't expect the drum to do everything. You will often need drum sander accessories like an edge sander to reach the perimeter of a room or sanding discs on a handheld unit to finish corners.
At Benchmark Abrasives, we recommend keeping a variety of grits on hand, ranging from a coarse grit for bulk material removal to finer grits for that final, buttery-smooth touch.
Step 4: Choosing the Right Grit and Sanding Sequence
The most common mistake in drum sander use is skipping grits. Your sanding sequence should be a logical progression.
- Start Coarse: For an old finish or a rough slab, use 36- or 40-grit sandpaper. This first pass is for leveling.
- The Middle Ground: Move to 60 or 80 grit. This stage removes the deep scratches left by the 36-grit.
- Finish Strong: Finish with 100- or 120-grit paper for hardwood flooring. For furniture, you might go up to 180.
Use light passes. It is much better to make three light passes than one heavy pass that stalls the motor and leaves burn marks. This step-by-step process ensures a high-quality finish and predictable sanding results.
Related Article: Introduction to Drum Sanders and Linear Finishing for Metalworkers
Step 5: Proper Sanding Technique
A drum floor sander is a "moving" tool. You must maintain a constant speed.
- Walking Motion: Start the motor with the drum raised. Begin walking forward, then gently lower the drum as you move.
- Straight Pass: Keep your straight pass consistent. If you stop moving while the drum is down, you will create a "divot" or sander mark that is nearly impossible to sand out.
- Feed Speeds: On a stationary shop sander, adjust the conveyor speed based on the wood type. Hardwoods require slower feed speeds to prevent burning, while softwoods can be fed faster but are prone to "crushing" if the drum height is too low.
If you find the drum can't reach certain spots, don't force it. Use an edge sander for the walls and follow up with hand sanding to blend the two areas seamlessly.
Step 6: Special Considerations for Large or Full Floors
Refinishing an entire floor is a lot of work, and it requires a different mindset than sanding a small board.
Start at a point where you can work with the light (usually from a window) so you can see the sanding results as you go. Never take off too much wood in one go; refinishing hardwood floors is a game of thinning the surface, and you only have so much "wear layer" to work with.
Pro Tip: As your sanding drum wears down, you'll notice the cut becomes less aggressive. Don't compensate by lowering the drum height too much; instead, change the paper. Using dull paper generates friction, which can cause burn marks and heat up the old finish until it becomes a sticky, gummy mess.
Step 7: Finishing Touches and Surface Quality
Once you've completed your sanding sequence, it's time to evaluate the finish quality. A smooth finish should have enough texture to "hold" a stain or sealer but no visible sander marks.
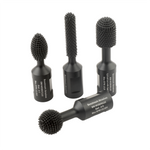
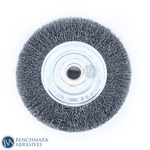
Use a bright shop light held at a low angle to the floor to check for "pigtails" or ridges. If you find defects, go back to hand sanding or use sanding discs on a random orbital sander with finer grits to blend the areas. The final product should feel uniform across the entire surface. If you are aiming for a specialty look, such as a "brushed" wood texture, you can use specialized wire-brush drum-sander accessories after your final flat sanding.
Common Mistakes and How to Avoid Them
- Uneven Sanding: This usually happens when the belt tracking is off or the machine isn't leveled. Check your manual to make sure the drum is parallel to the bed.
- Burn Marks: Caused by slow feed speeds or a drum that is set too low. If the wood smells scorched, lift the drum immediately.
- Skipping Grits: If you go from 36 grit to 100 grit without intermediate grits, you will have "ghost" scratches that only appear after you apply a stain.
- The "Stop" Mark: Never stop moving while the drum is in contact with the wood. This is the #1 quality issue for your workpiece.
Master Your Drum Sander for Flawless Results
Using a drum sander is an essential skill for anyone serious about woodworking projects. By mastering the drum height, selecting the right grit, and maintaining a steady pace, you can achieve professional-looking results in a fraction of the time it takes with handheld tools.
Remember that the quality of your abrasive belts and sanding rolls dictates your finish quality. At Benchmark Abrasives, we provide the professional-grade supplies needed to keep your sanding drum cutting cool and clean. Whether you're doing a first pass on a reclaimed oak slab or a final polish on a walnut table, having the right gear makes all the difference.
Ready to get started? Explore our full range of drum sander accessories, high-performance sanding discs, and durable abrasive belts designed for both shop machines and drum floor sanders. Check out our collection at Benchmark Abrasives and take your craftsmanship to the next level.
Join Our Newsletter
Sign up to get the latest on sales, new releases and more …Join Our Newsletter
Sign up to get the latest on sales, new releases and more …Shop Categories
Recent Articles
- How to Choose the Right Diamond Blade for Grinder
- Wire Wheels and Brushes: How to Choose the Right One
- How to Deburr Metal Safely and Efficiently
- How to Reduce Heat Discoloration When Grinding Stainless Steel
- How to Achieve a Mirror Finish on Stainless Steel
- A Fabricator’s Guide to Surface Prep Before Powder Coating
- What Causes Burn Marks During Sanding and Grinding, and How to Prevent Them
- Beginner’s Guide to Metal Surface Prep Before Welding
- How to Choose the Right Abrasive Wheel for Your Grinder
- How to Use a Drum Sander: Step-by-Step Guide for Woodworking
Featured Products
-
 746 Reviews
4-1/2" x 7/8" T29 Zirconia High Density Flap Disc - 10 pack
$25.19
-
 738 Reviews
4-1/2" x .040" x 7/8" t1 premium thin cut-off wheel - 25 pack
$20.88
-
 220 Reviews
4-1/2" x 7/8" T27 Zirconia High Density Flap Disc - 10 pack
$25.19
-
 380 Reviews
6" x .045 x 7/8" T1 Premium Thin Cut-Off Wheel - 25 pack
$27.29
-
 55 Reviews
Nonwoven 6" X 9" Scuff, Clean & Finish Hand Pads
$0.83
-
 123 Reviews
4-1/2" x 1/4" x 7/8" T27 Depressed Center Grinding Wheel - 25 pack
$28.34


Blog Categories
- Abrasives
- Sanding
- Grinding Deburring Finishing
- Safety and Cleanliness
- Metal Working
- Selecting Tools And Equipment
- Wood Working
- Art And Design
- Diy Projects
- Industry 4.0
- Buffing
- Cutting Tools
- Carbide Burrs
- PPE
- Wire Brushes
- Bonded Abrasives
- TIG Electrodes
- Wire Wheels
- Bits
- Diamond Blades
- Power Brushes
- Product Reviews
- Grinding
- Finishing
- Industrial Cleaners